I finally broke down and purchased a 12.5 inch
mirror.
My first telescope (8" f/7; built in 1999) has served me well and will continue
to do
so, but it will probably stay home on camp outs (too big). I
desired
to make my new telescope pack up into a smaller space. When
taking four people and a dog camping, space is a premium. I also
desired
the scope to be relatively simple to build and set up. The
following describes the results.
The scope was built during the summer of 2006 and saw first light at
the Oregon
Star Party (OSP) in August 2006. I first saw a string telescope at a
previous OSP
and thought that that is The Way to build an efficient structure -
strings take
up no space and by using a simple lug the compression poles can be split in two for
tight packing. See Dan Gray's web page, the likely creator of the string telescope concept.
Since reducing volume and making the scope simple
were my goals, I saw no need to create a complex secondary mirror
structure (ring). A single steel bar does just fine (if done
right).
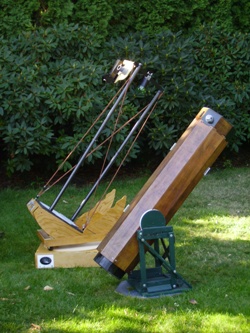
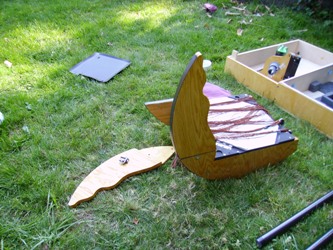
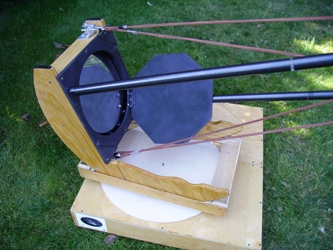
Pictured below is the new 12.5" string scope and my first tube
telescope.
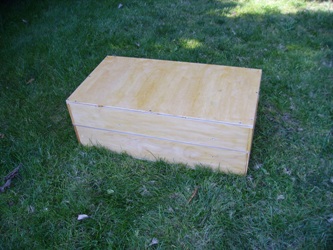
The entire telescope (including poles, rockers, etc.) packs into the
31" X 16" X 10.7" box - pretty small! This was the design target so
that the box could be stored in a specific cabinet. Due to a redesigned baseboard, the baseboard does not fit in the box - sigh.

Total weight, including the
box is between 40 and 45 pounds - not too heavy either!
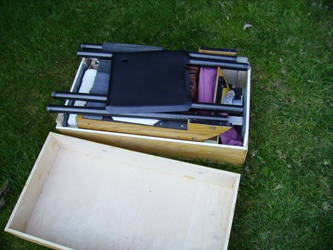
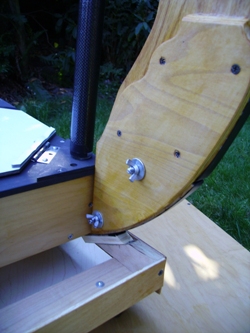
The rockers are attached with two wing nuts each. Removal of the
rockers is required to fit in the storage box.
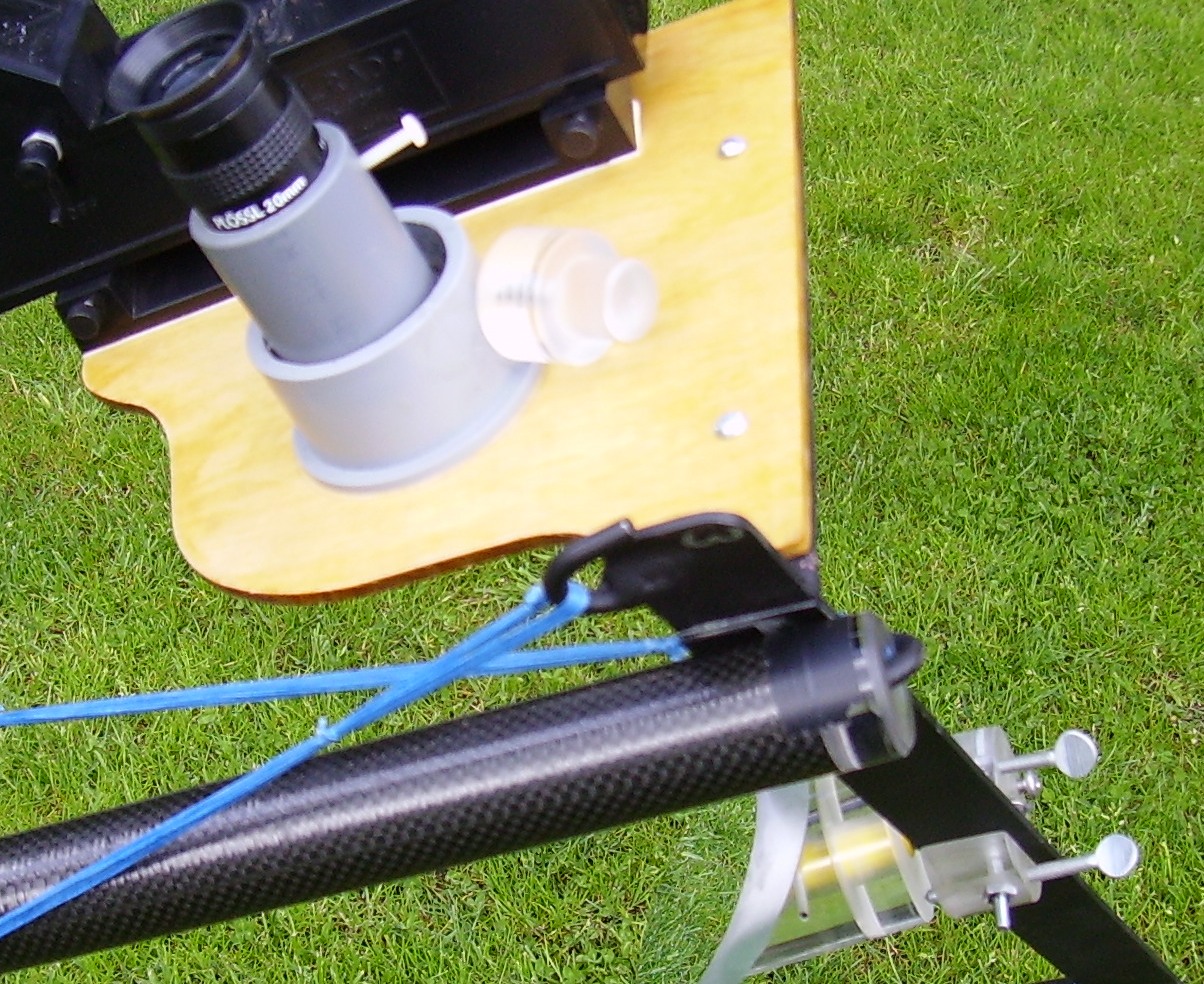
The main unique feature of this telescope is the absence of a secondary
ring. The secondary mirror is mounted to a single steel bar (the secondary bar). The homemade focuser and Telrad are mounted on a wooden plank that is attached to the steel bar (actually, an additional steel bar is welded to the secondary's steel bar, and the plywood is mounted to that).
The two compression poles are held in place by attaching the four strings to the secondary bar and having the bar resting on top of the two poles. Two poles and four strings are sufficient to prevent
five of six degrees of freedom (the secondary bar cannot move up/down,
left/right, forward/backward, nor twist in two of the three axis of
rotation). However, although the poles are fixed and cannot move, the bar would normally be free to rotate (tip over). Imagine trying to rest a long skinny plate on the ground - it would want to tip over. The same is true of the secondary bar. To prevent rotation of the bar about the top of the
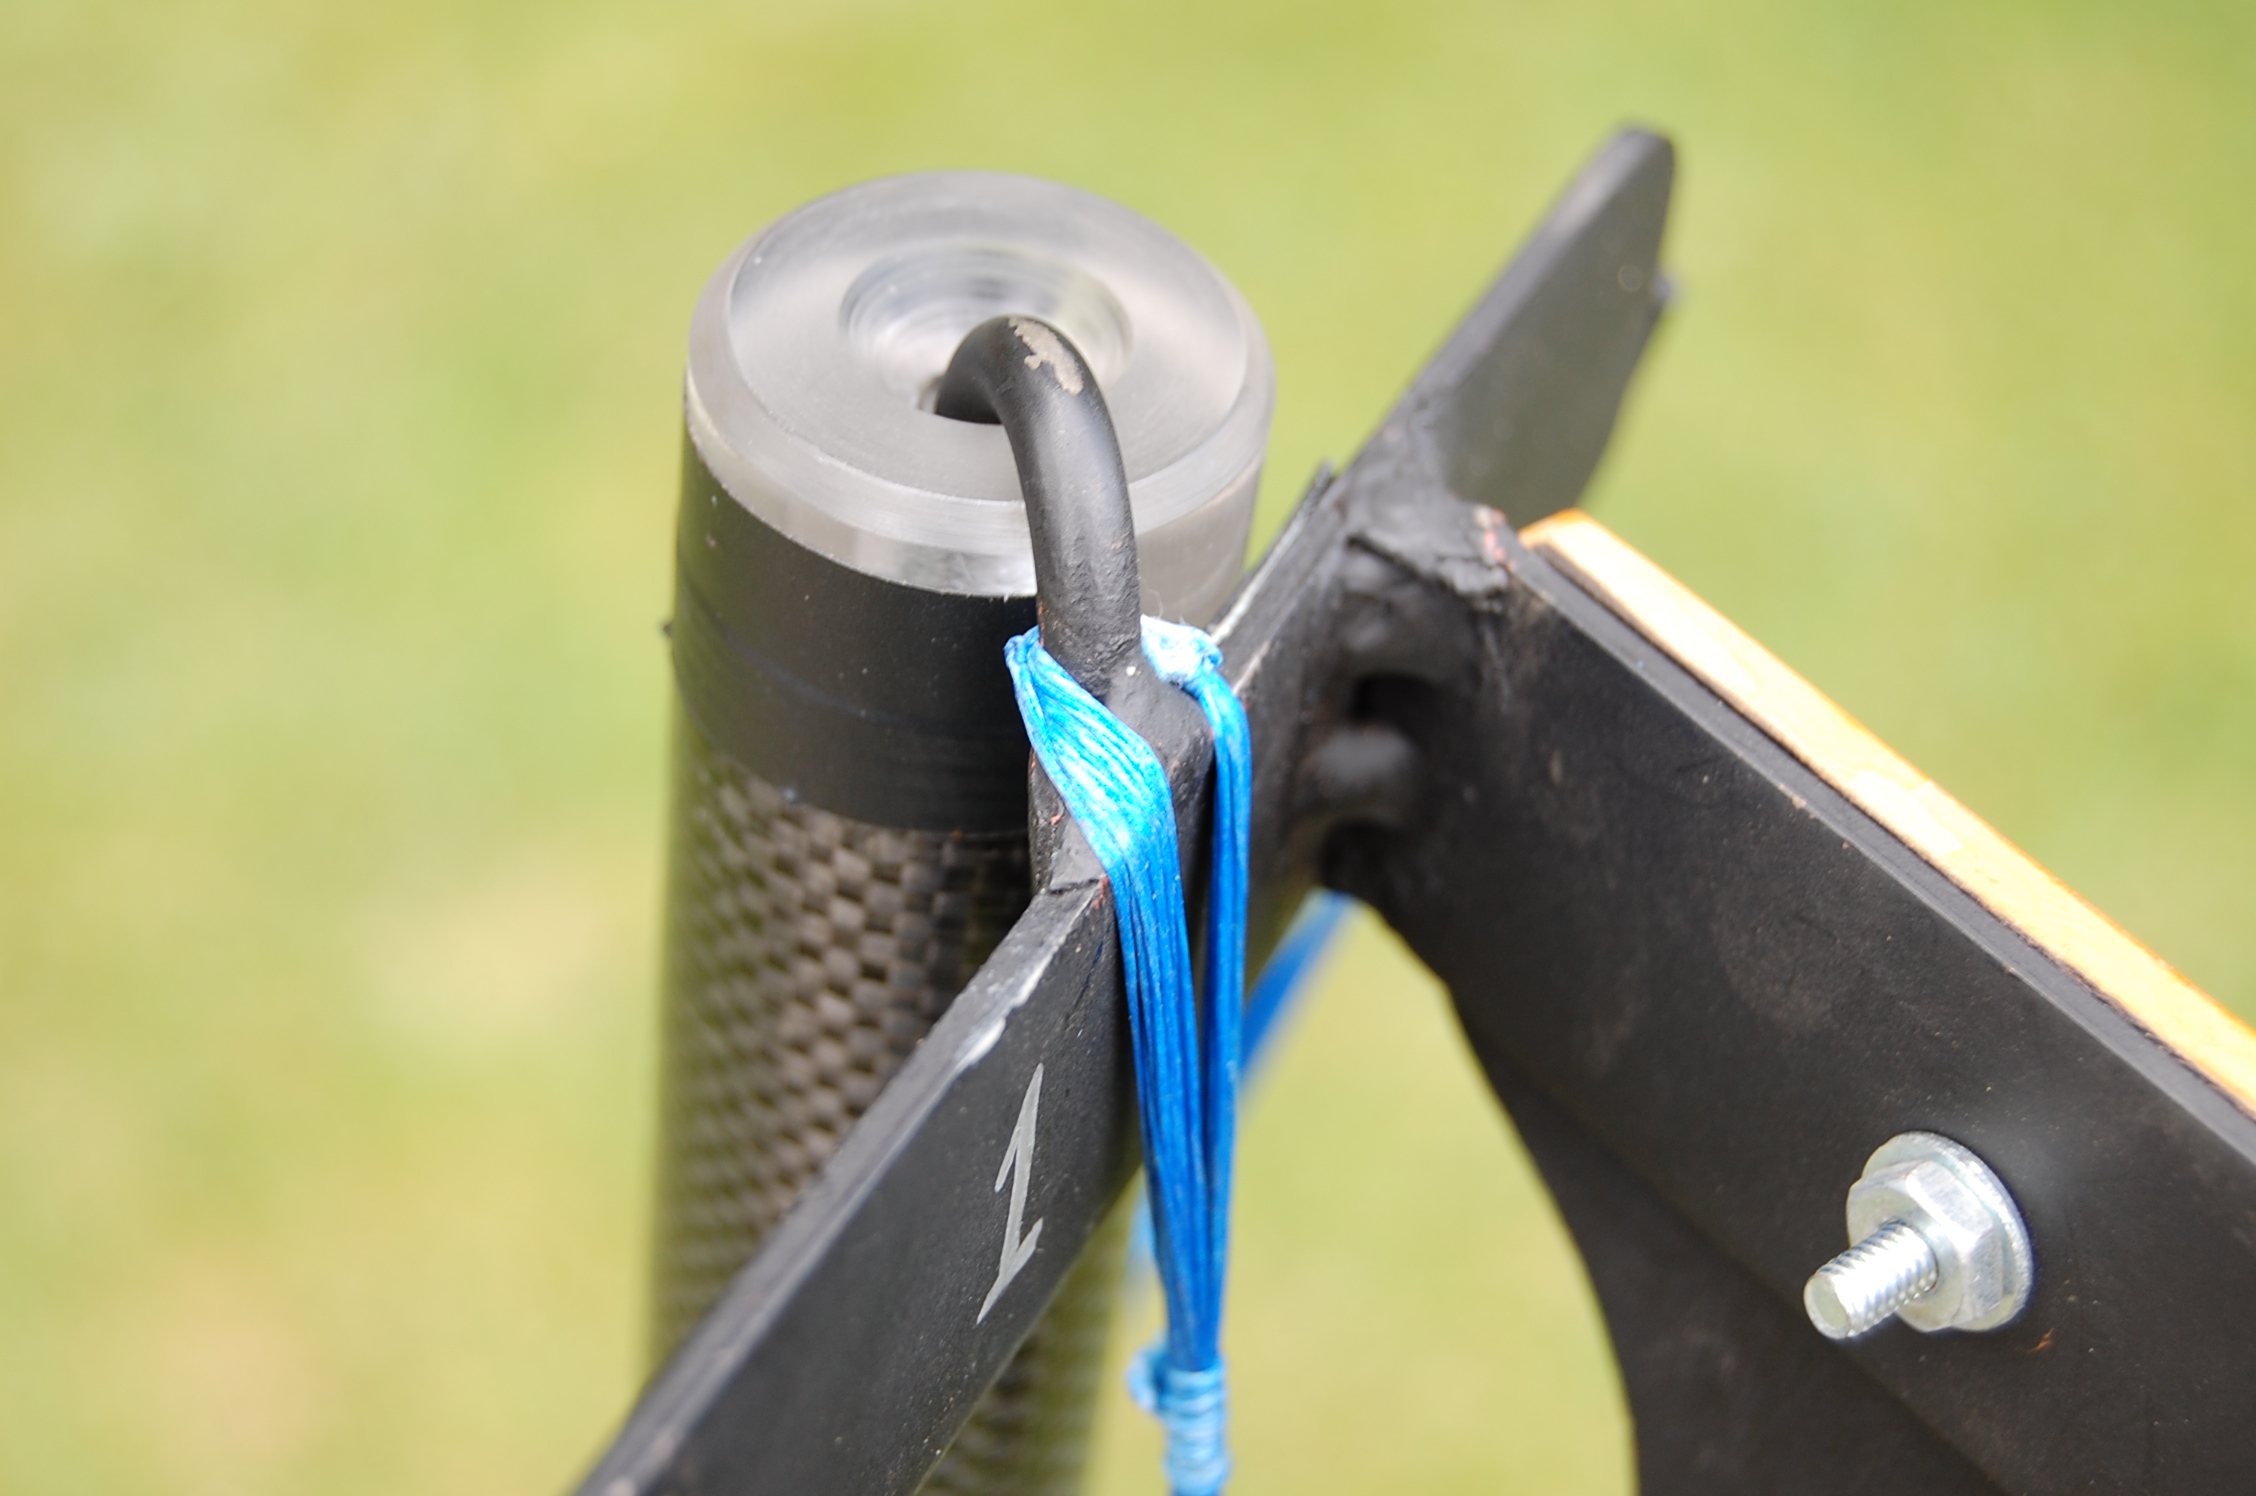
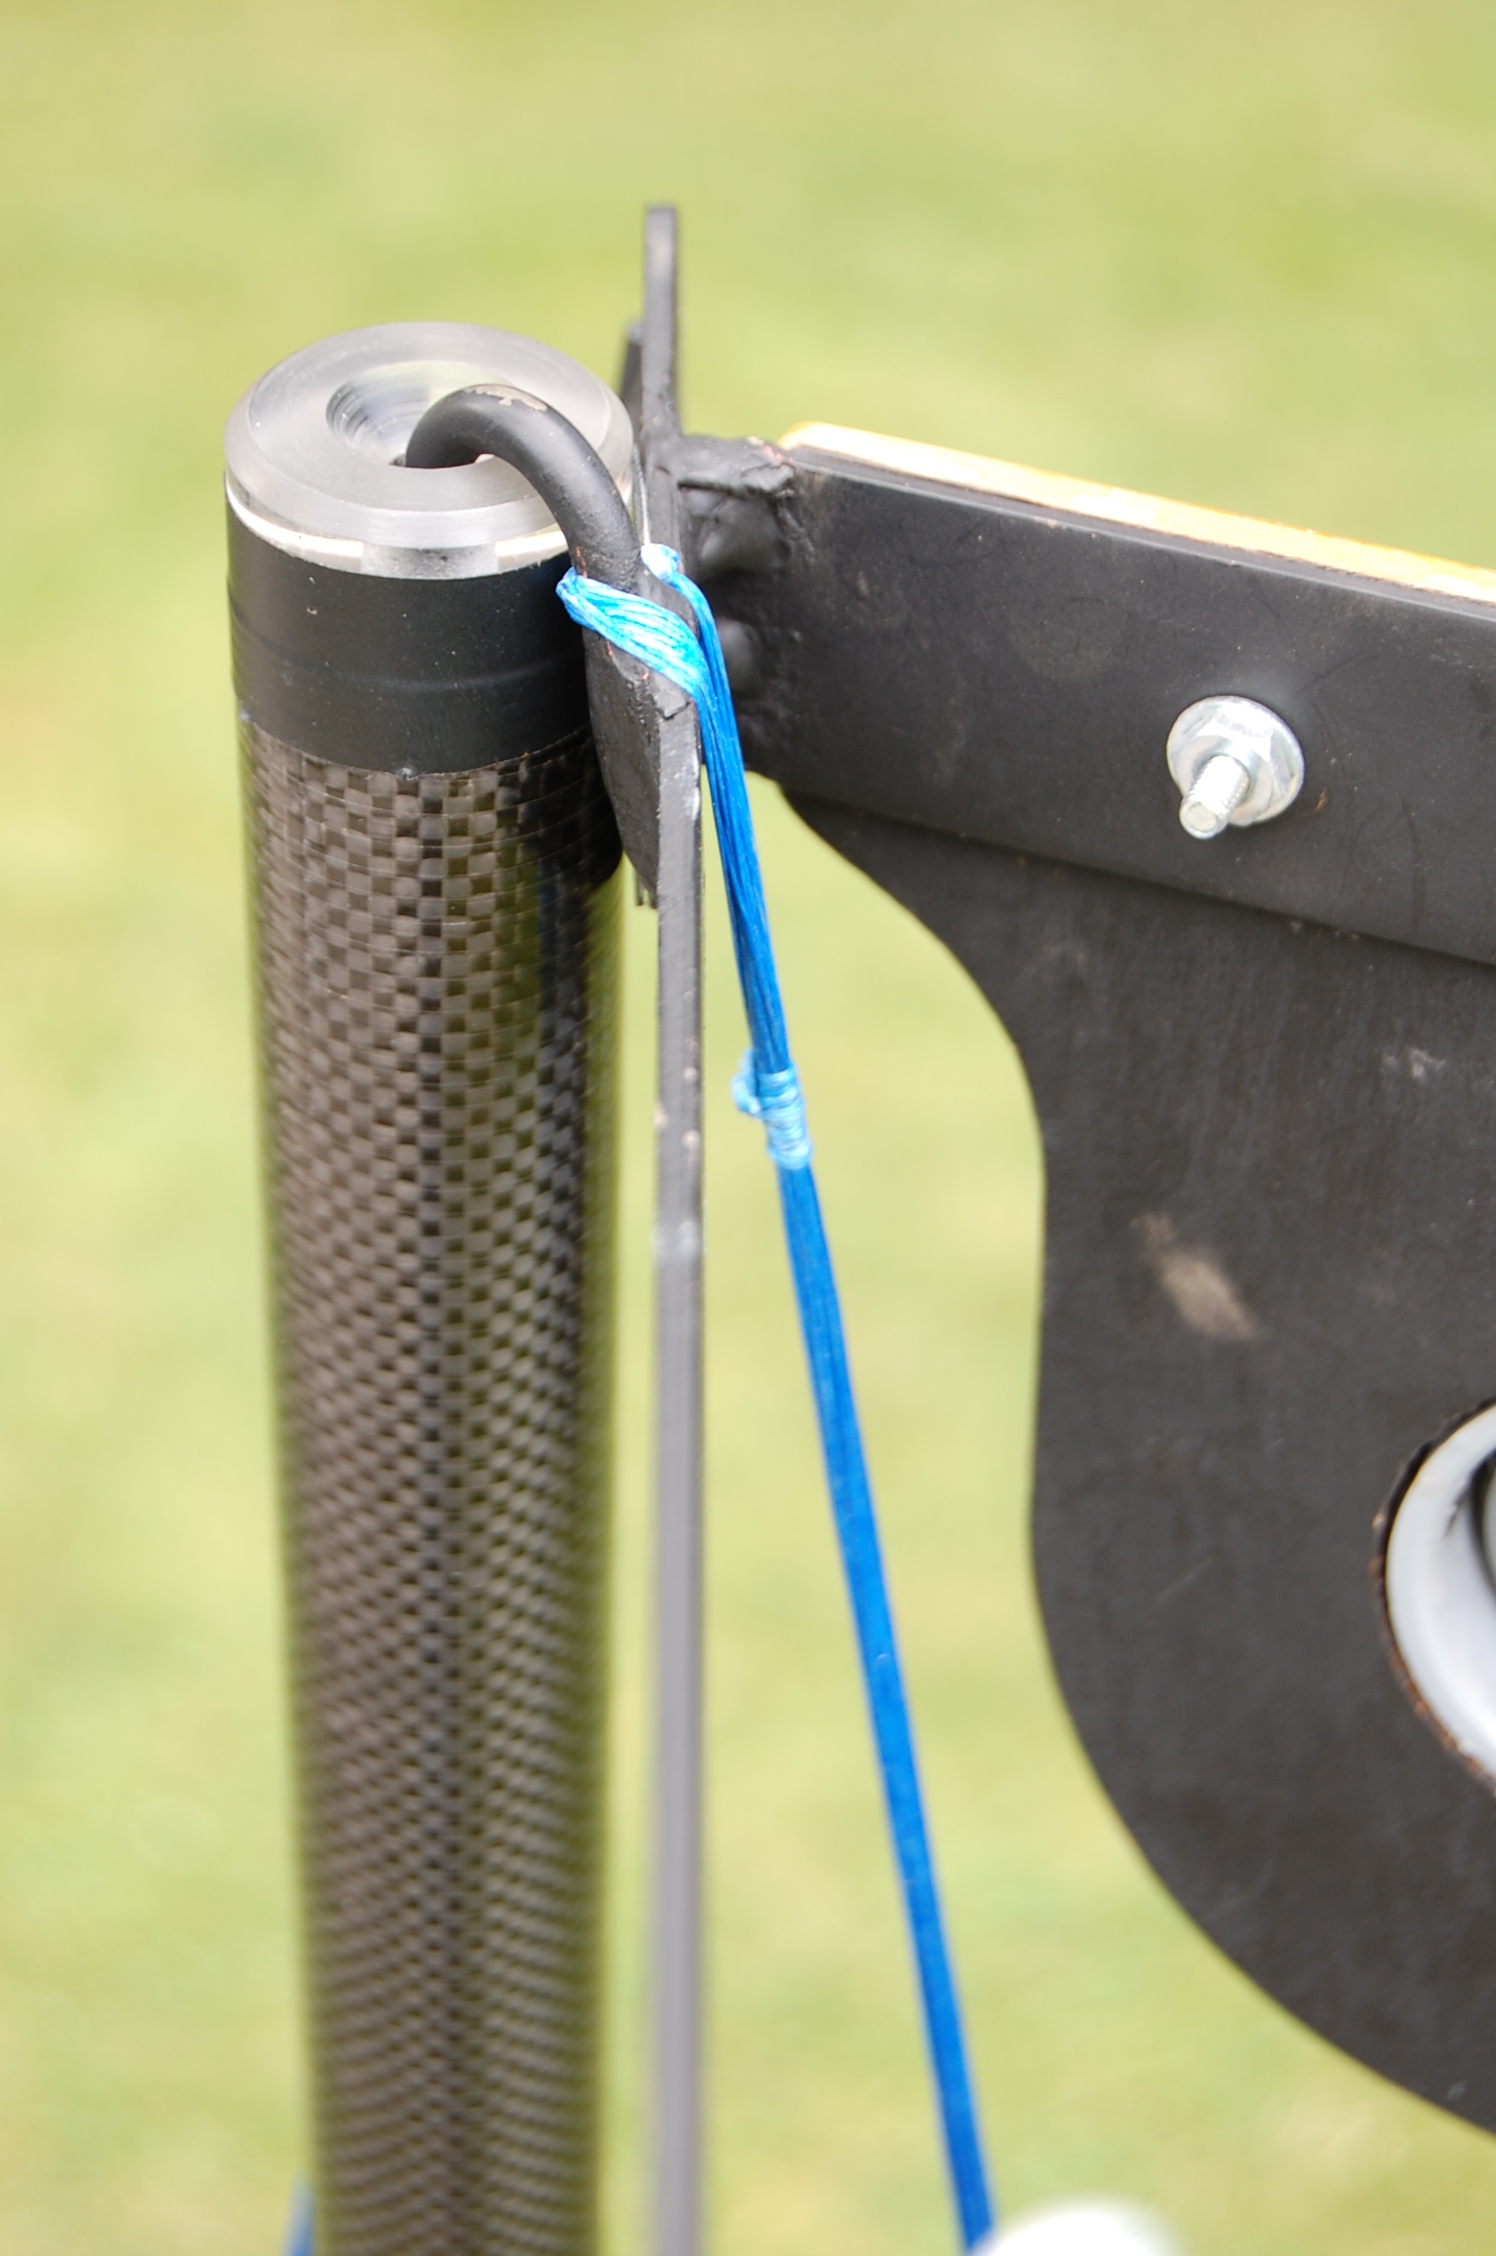
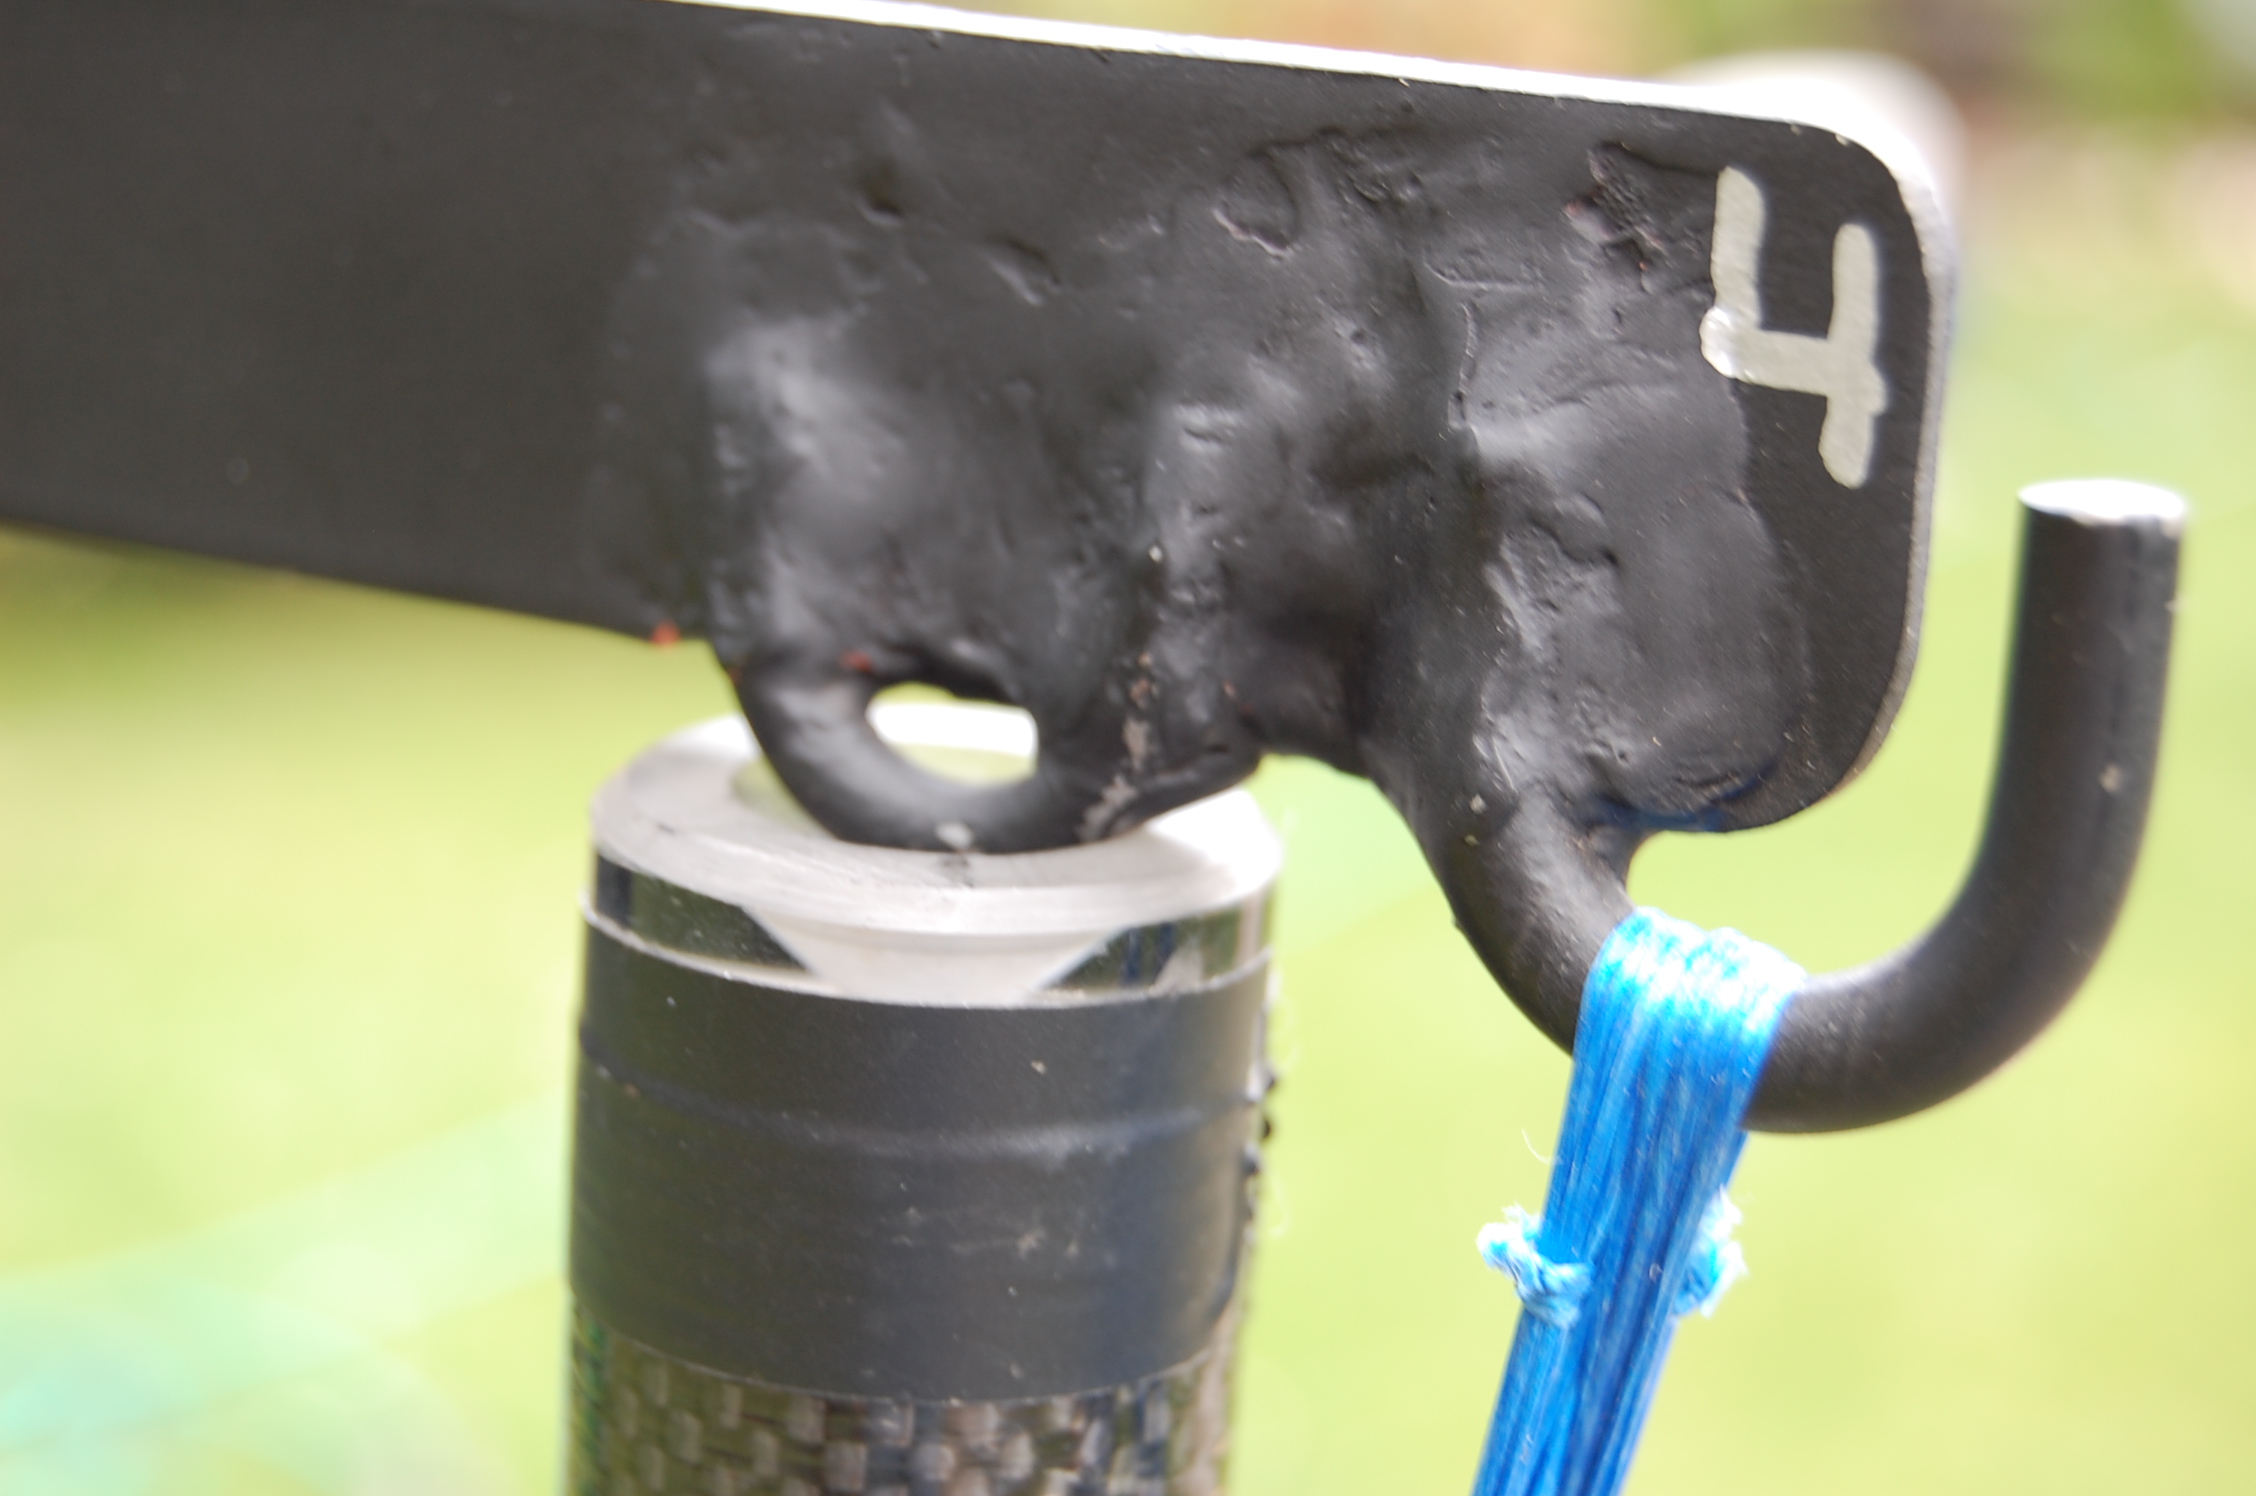
poles ("tipping"), the secondary bar is attached to the top of one pole using a "hook." Two strings are attached in such
a way as to force the bar to twist into the pole: one string is attached to the top of the secondary bar and the other string is attached to the bottom of the bar. This arrangement puts a small amount of torque on the secondary bar (since the opposite end of each string is attached to opposite sides of the main box). The secondary bar is thus held against the pole keeping it parallel to this pole.
Still confused?
If you are trying to hold a single pole up (like a radio tower), it is best if that pole was free to tip in any direction if it wasn't for the guy lines (in other words, do NOT dig a hole to burry the end of the tower in - if you do, then you must have the exact right length for the guy lines). Attach three guy lines (ropes, cables, or strings...) to the top of the tower/pole, ideally each at 120 degrees from the other. Pull all three lines tight to the ground. The tower/pole now is held in place, it will not tip. In order for it to tip, at least one line would have to stretch (that's why having stiff string is important - stretch is bad).
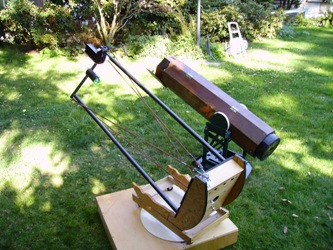
This scope works off of the same idea - except I have 2 poles. Each pole has 2 guy lines (strings) and the effective third "guy line" is the metal bar that supports the secondary mirror. (This is very difficult to explain in words, sorry). This arrangement is sufficient to keep everything in place - except that as I've described it so far, the metal secondary bar would be free to "tip over" while it rests on top of the poles. To prevent it "tipping" I've attached it to one pole using a hook (see photos) and attached the 2 strings to cause the bar to twist into the pole (the pole is a stop).

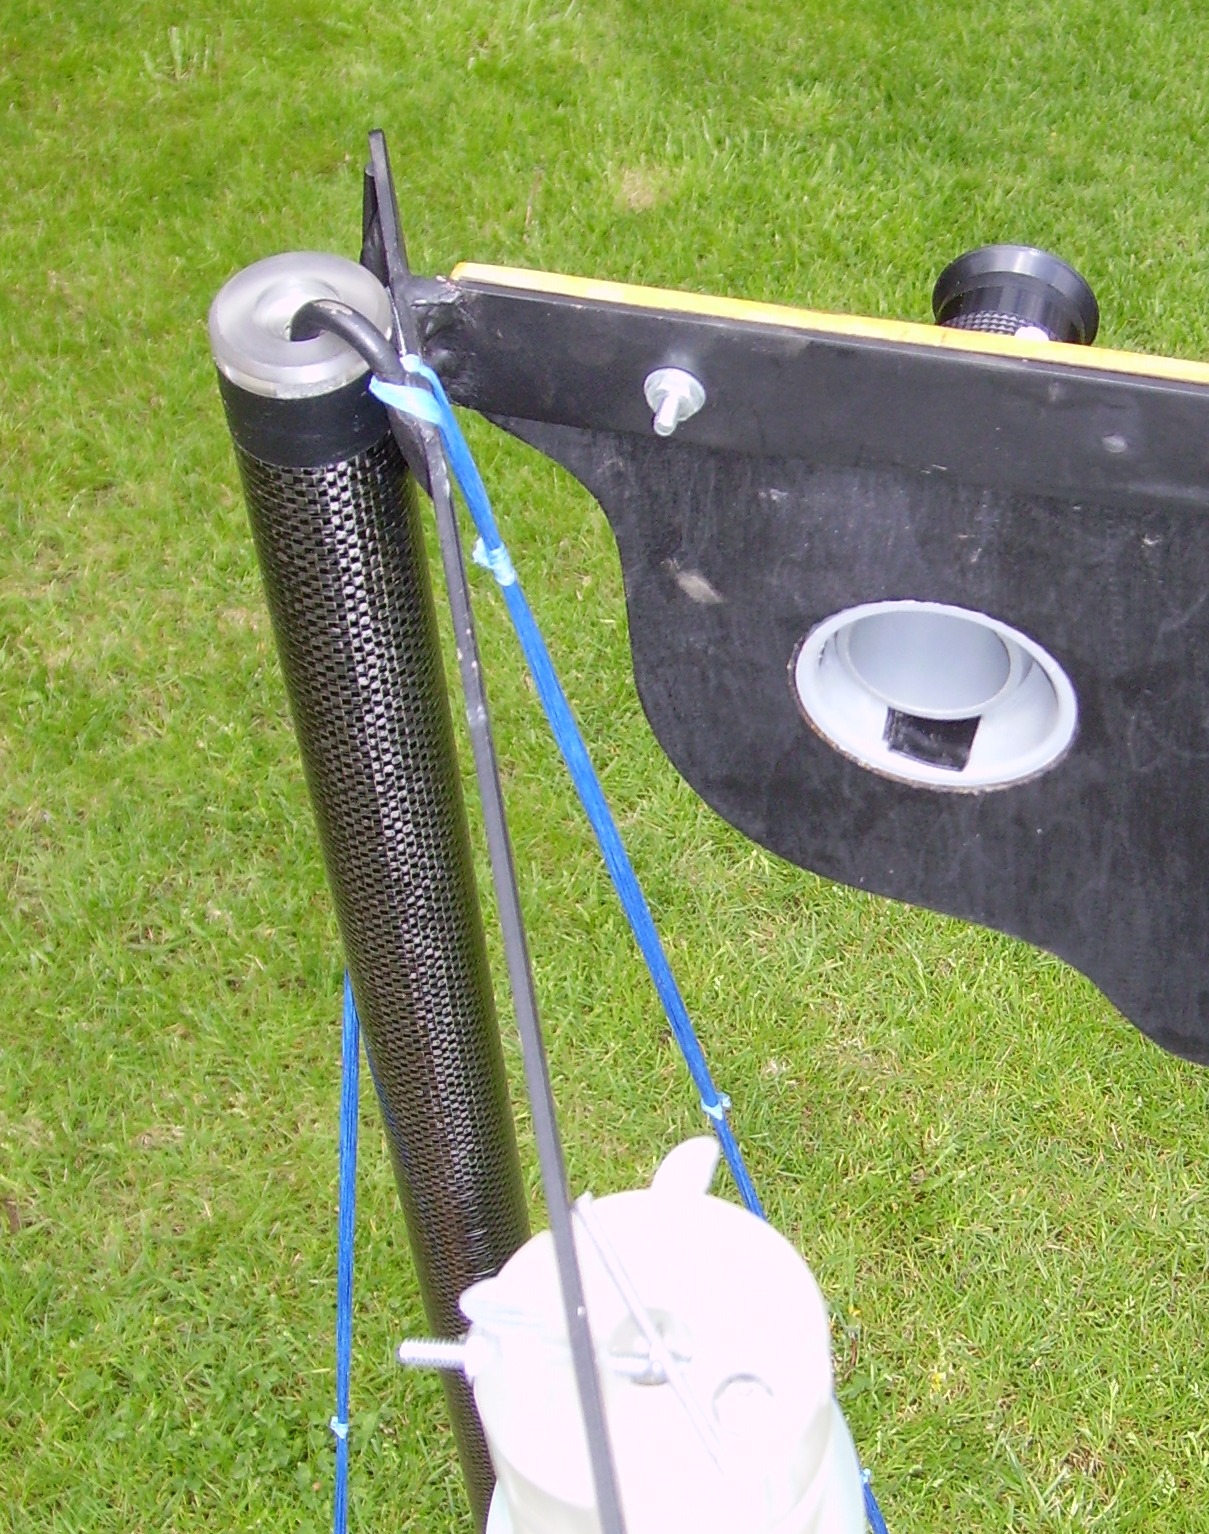
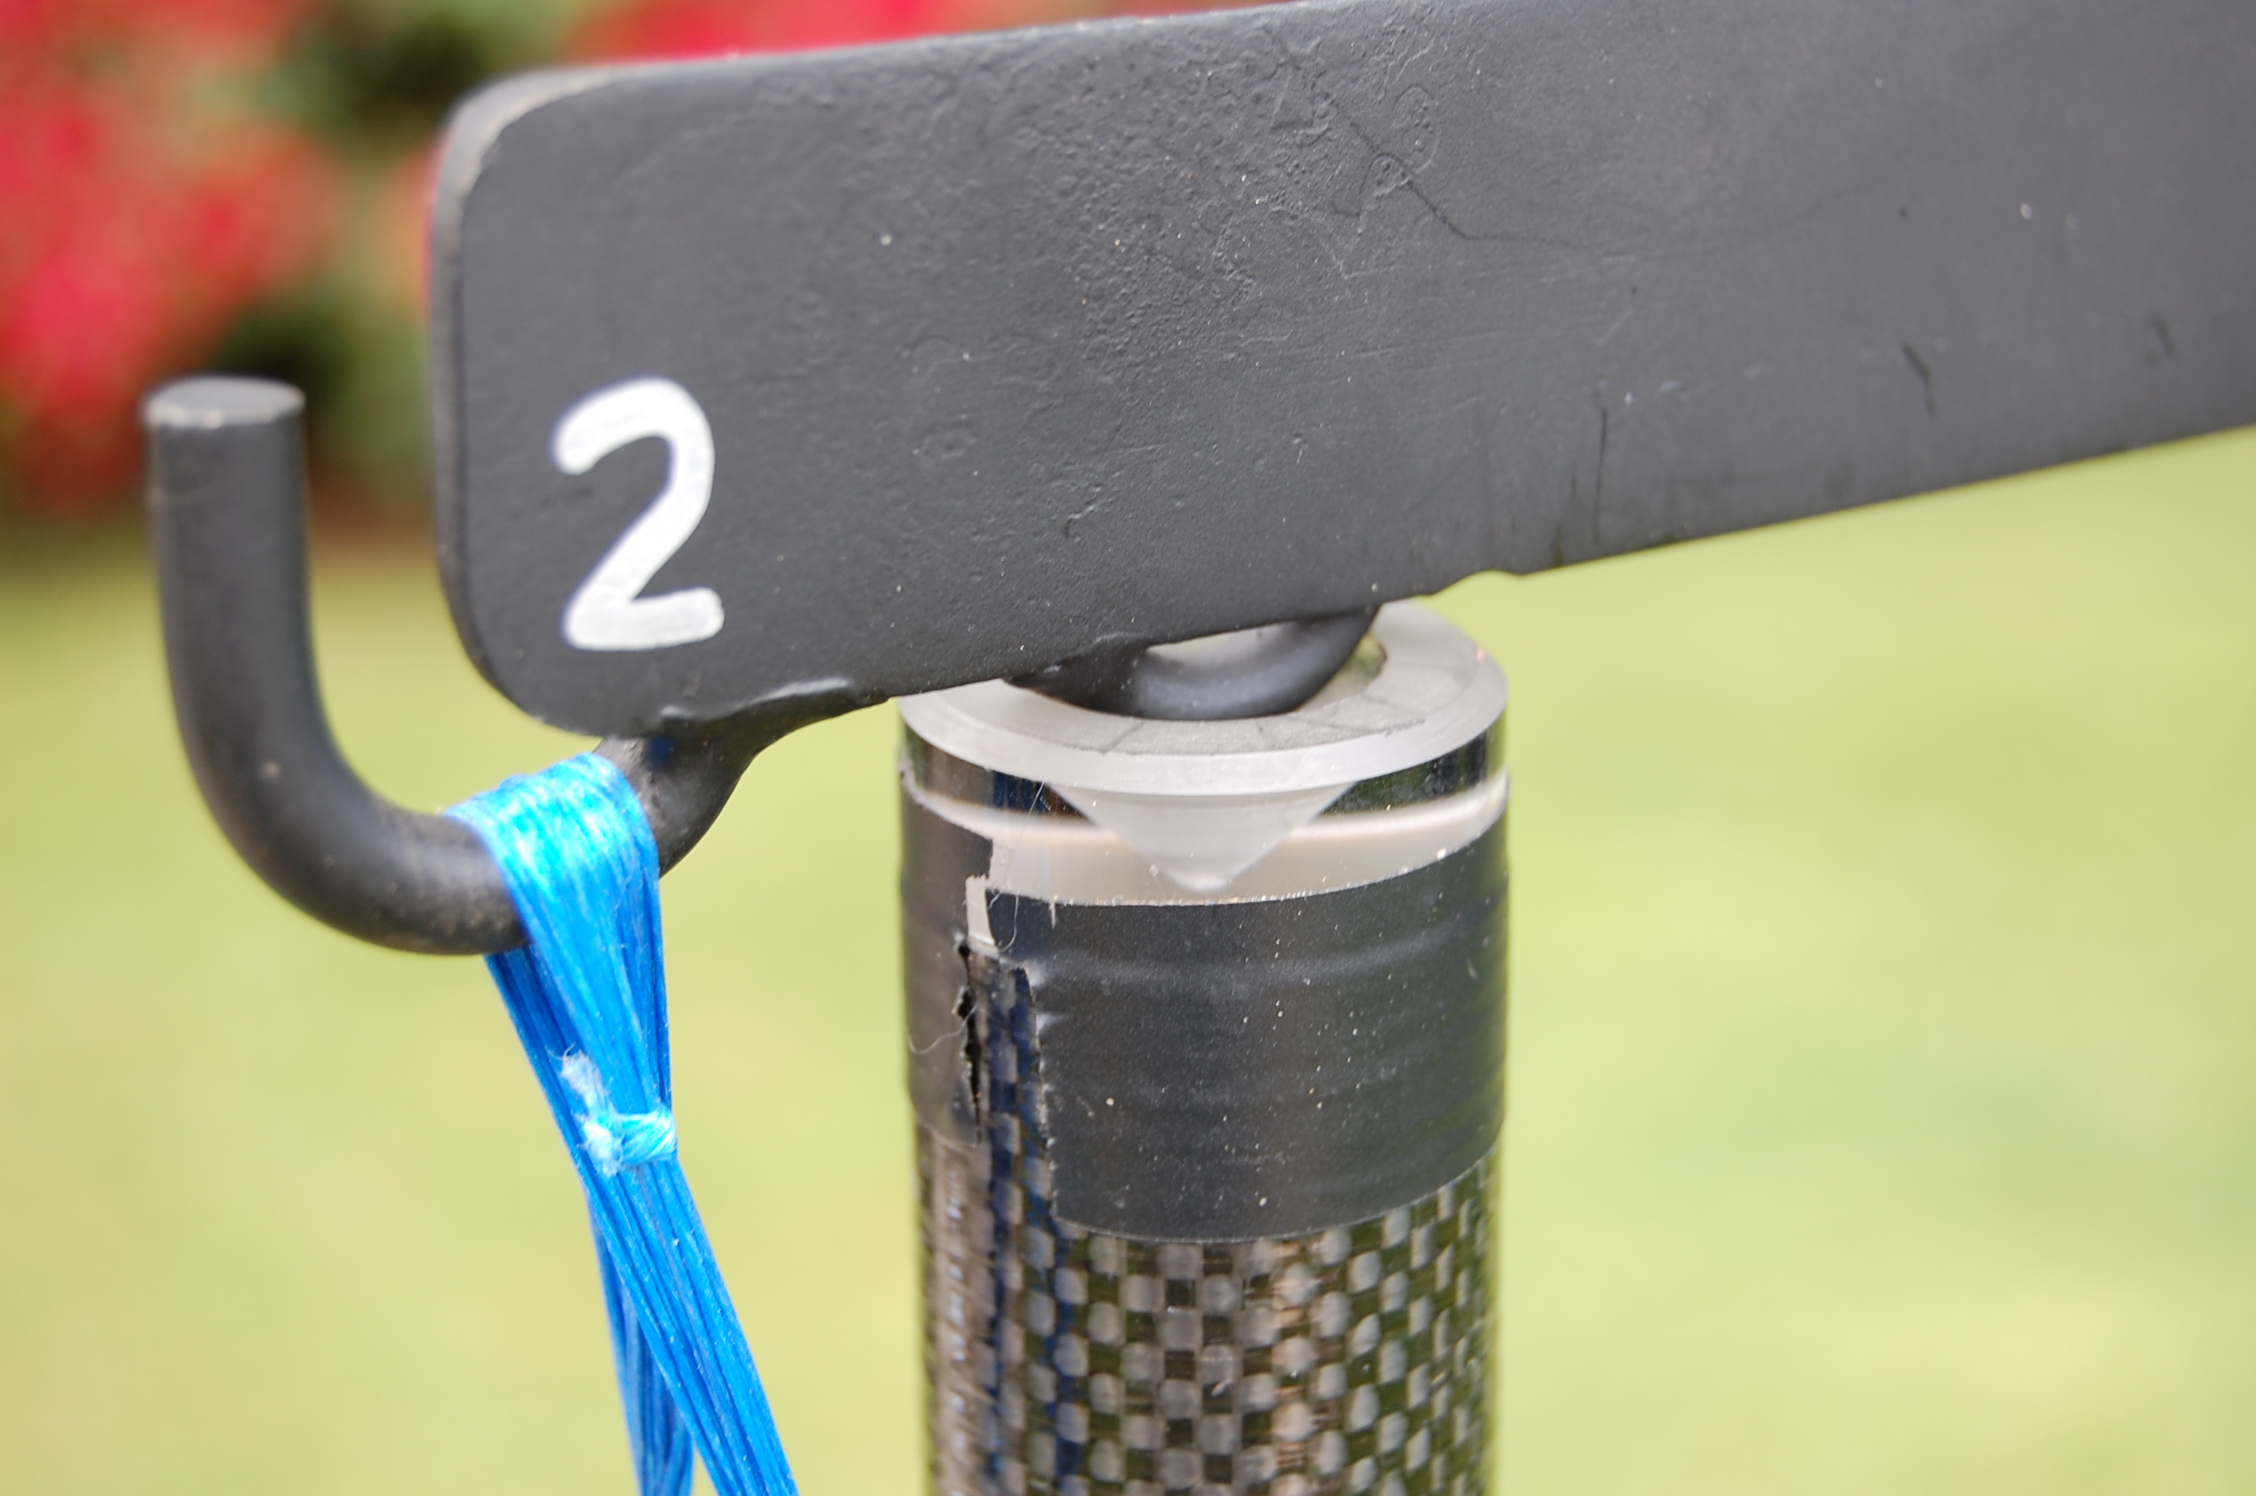
The other end of the secondary
bar rests on top of the other pole. The two strings on that end
are
attached at the same level as the top of the pole/bottom of the
bar (picture below). This allows rotation between the secondary bar and this
pole - in otherwords, the secondary bar could tip over if not constrained at the other end (at the "eyepiece end" above ). Trying to force the bar to be parallel to both poles would
require exact adjustment of string lengths. Requiring exact
assembly is a bad idea since perfection can never really be
attained. It is better to constrain only what is necessary and
not over-constrain. The ends of the bars are numbered corresponding to a number where the strings attach to the main box, thus helping assembly (identifies where each string attaches ).
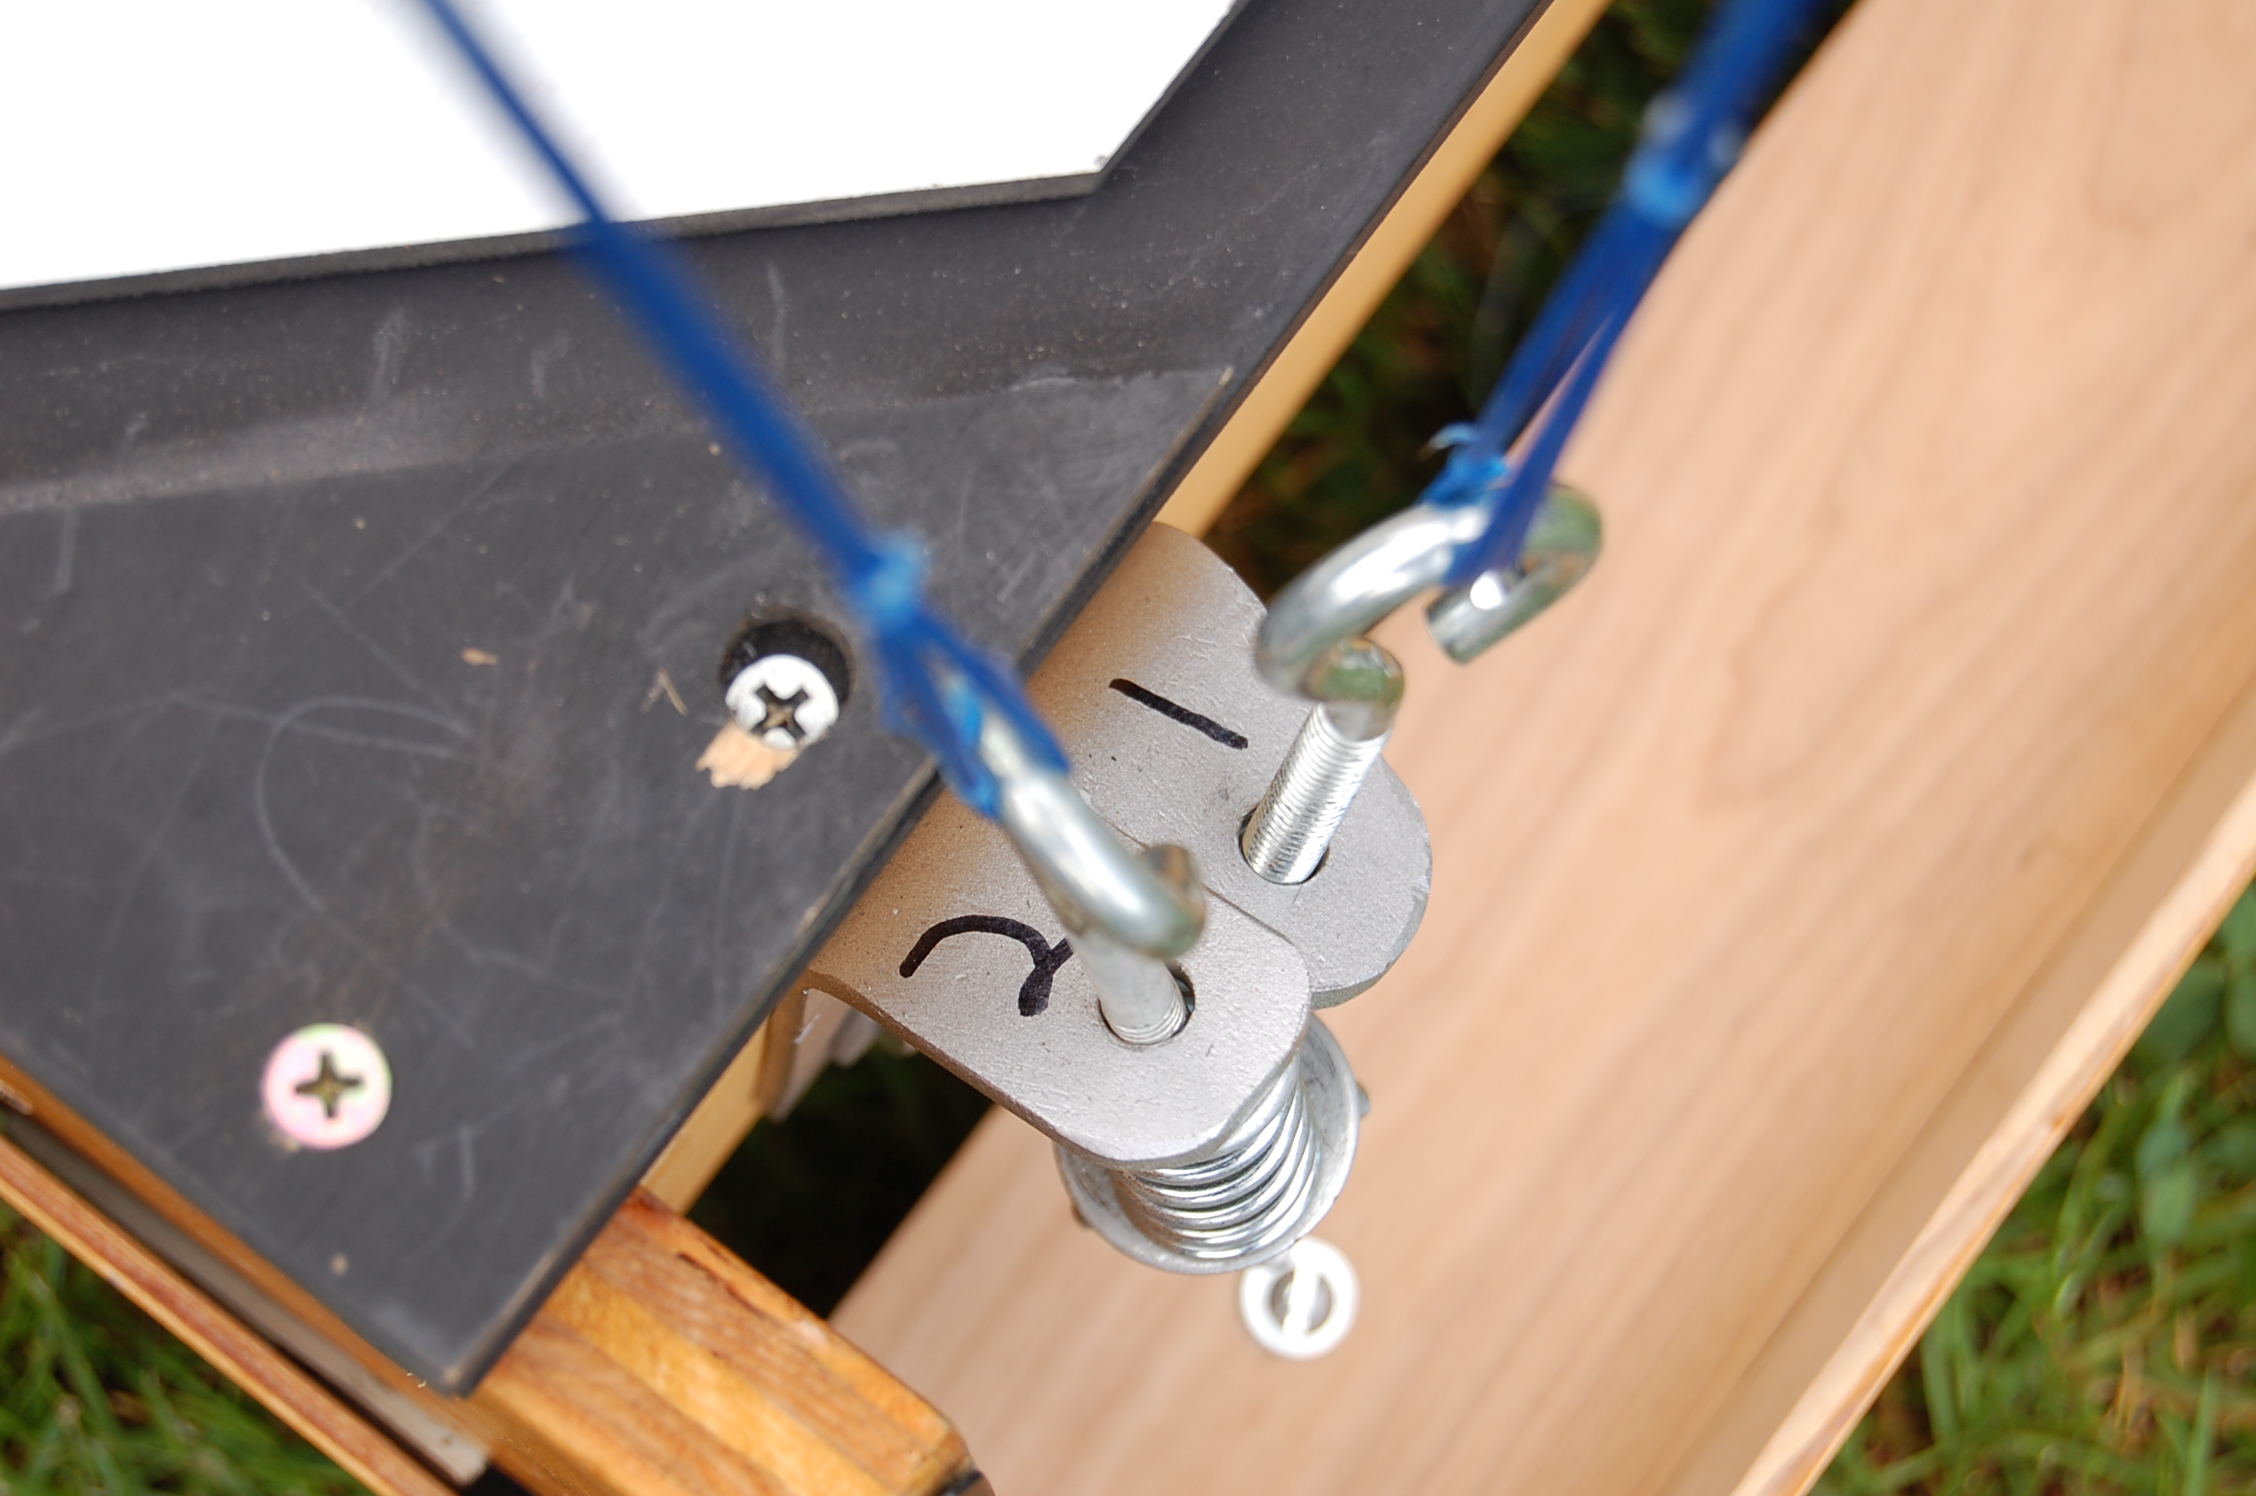
The structure is kept tight using a stiff spring. The string is attached to an eye bolt, and by tightening the wing nut on the bolt, the string is stretched tight and the stiff spring is compressed. Each of the other three strings' length were adjusted with eye bolts (no spring). Once the desired length was originally obtained, there is no longer a need to adjust those three strings. Therefore, a nylock (nylon insert lock nut) was used to set the length of their eyebolts.
The scope typically needs slight re-collumation for each setup.
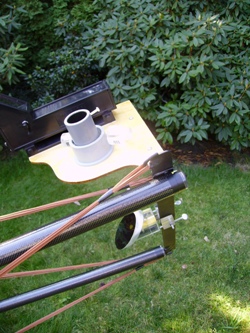
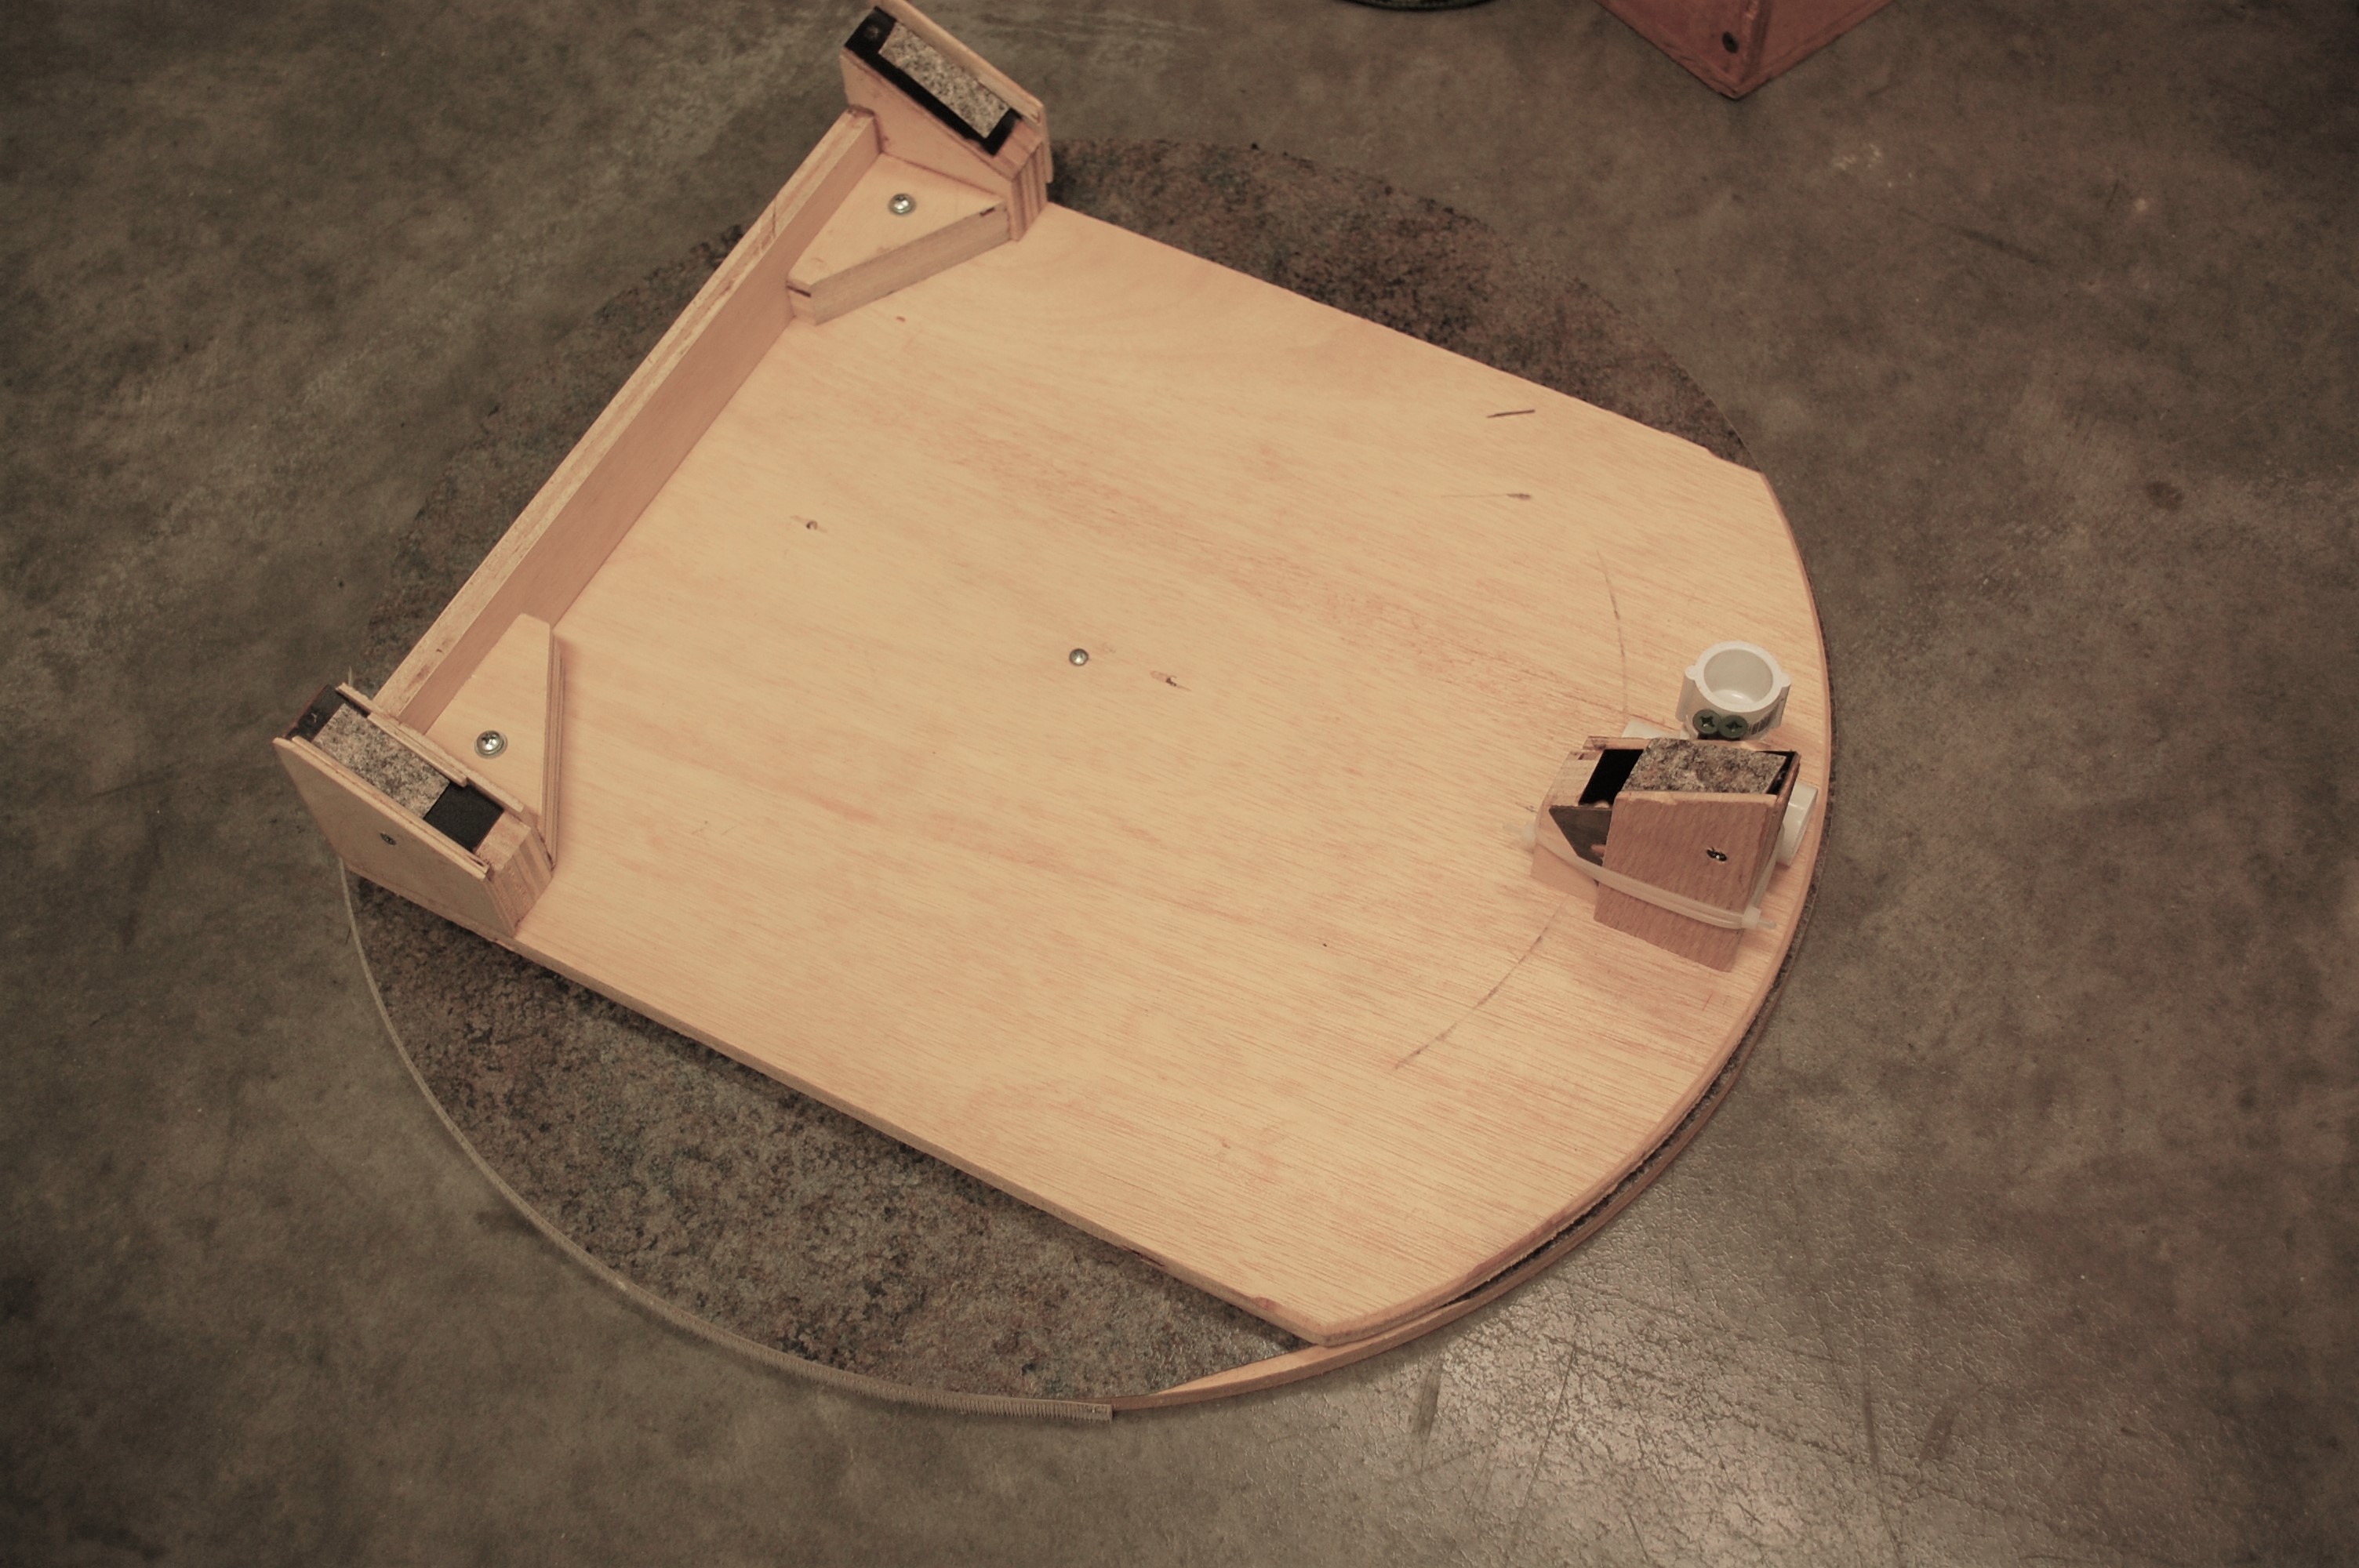
The scope sits on top of a flimsy base - an idea that has been
incorporated in many telescopes. By placing the rocker supports
over the top of the base wheels, the "flimsiness" allows the box to
maintain good contact with the base. Rollers were purchased from
a hardware store and provide smooth motion.
The baseboard originally was the storage box (shown in above photo). A 1/4 inch thick round board served as a guide to keep the wheels on track - didn't work very well. I thought using the storage box would be a good way to save space, however, the box does get in the way of some viewing angles and places the eyepiece too high off the ground. A new baseboard was designed:
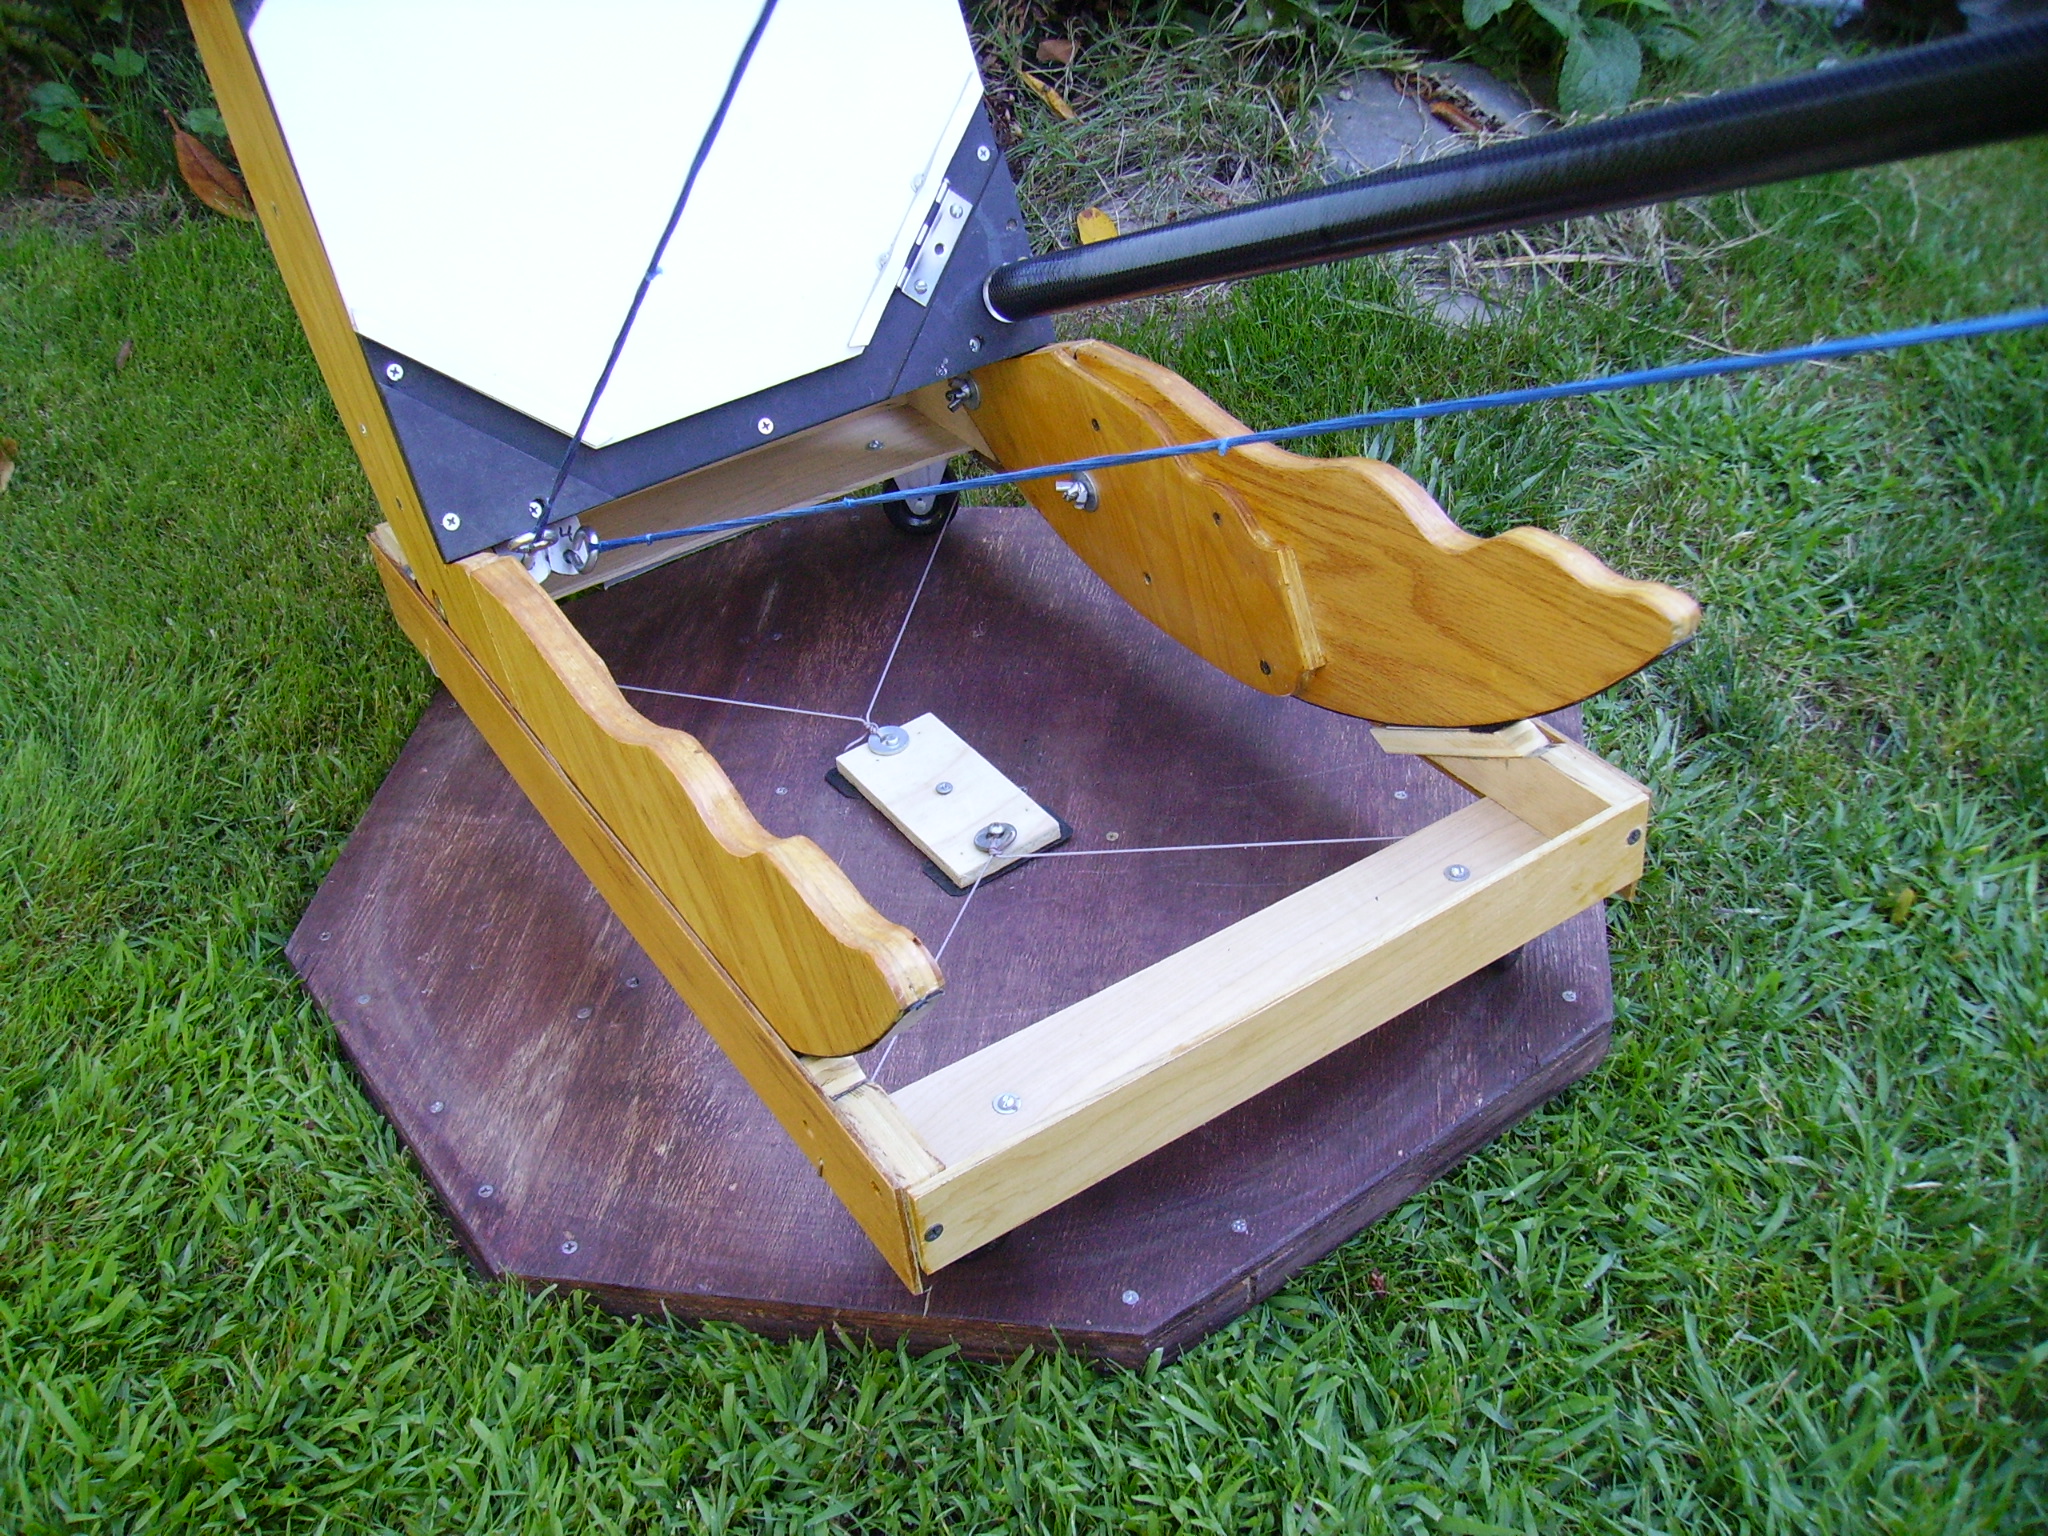
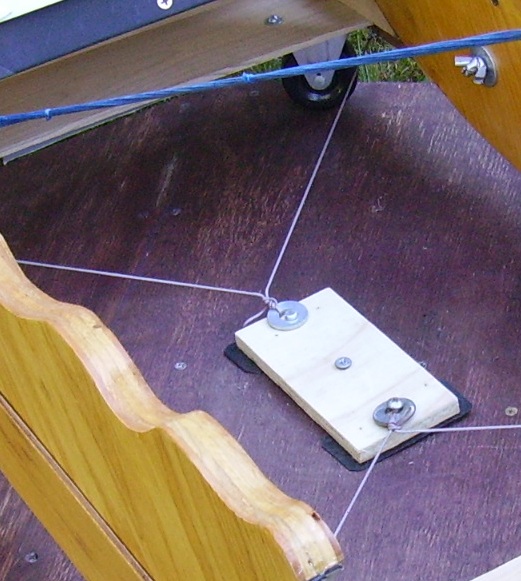
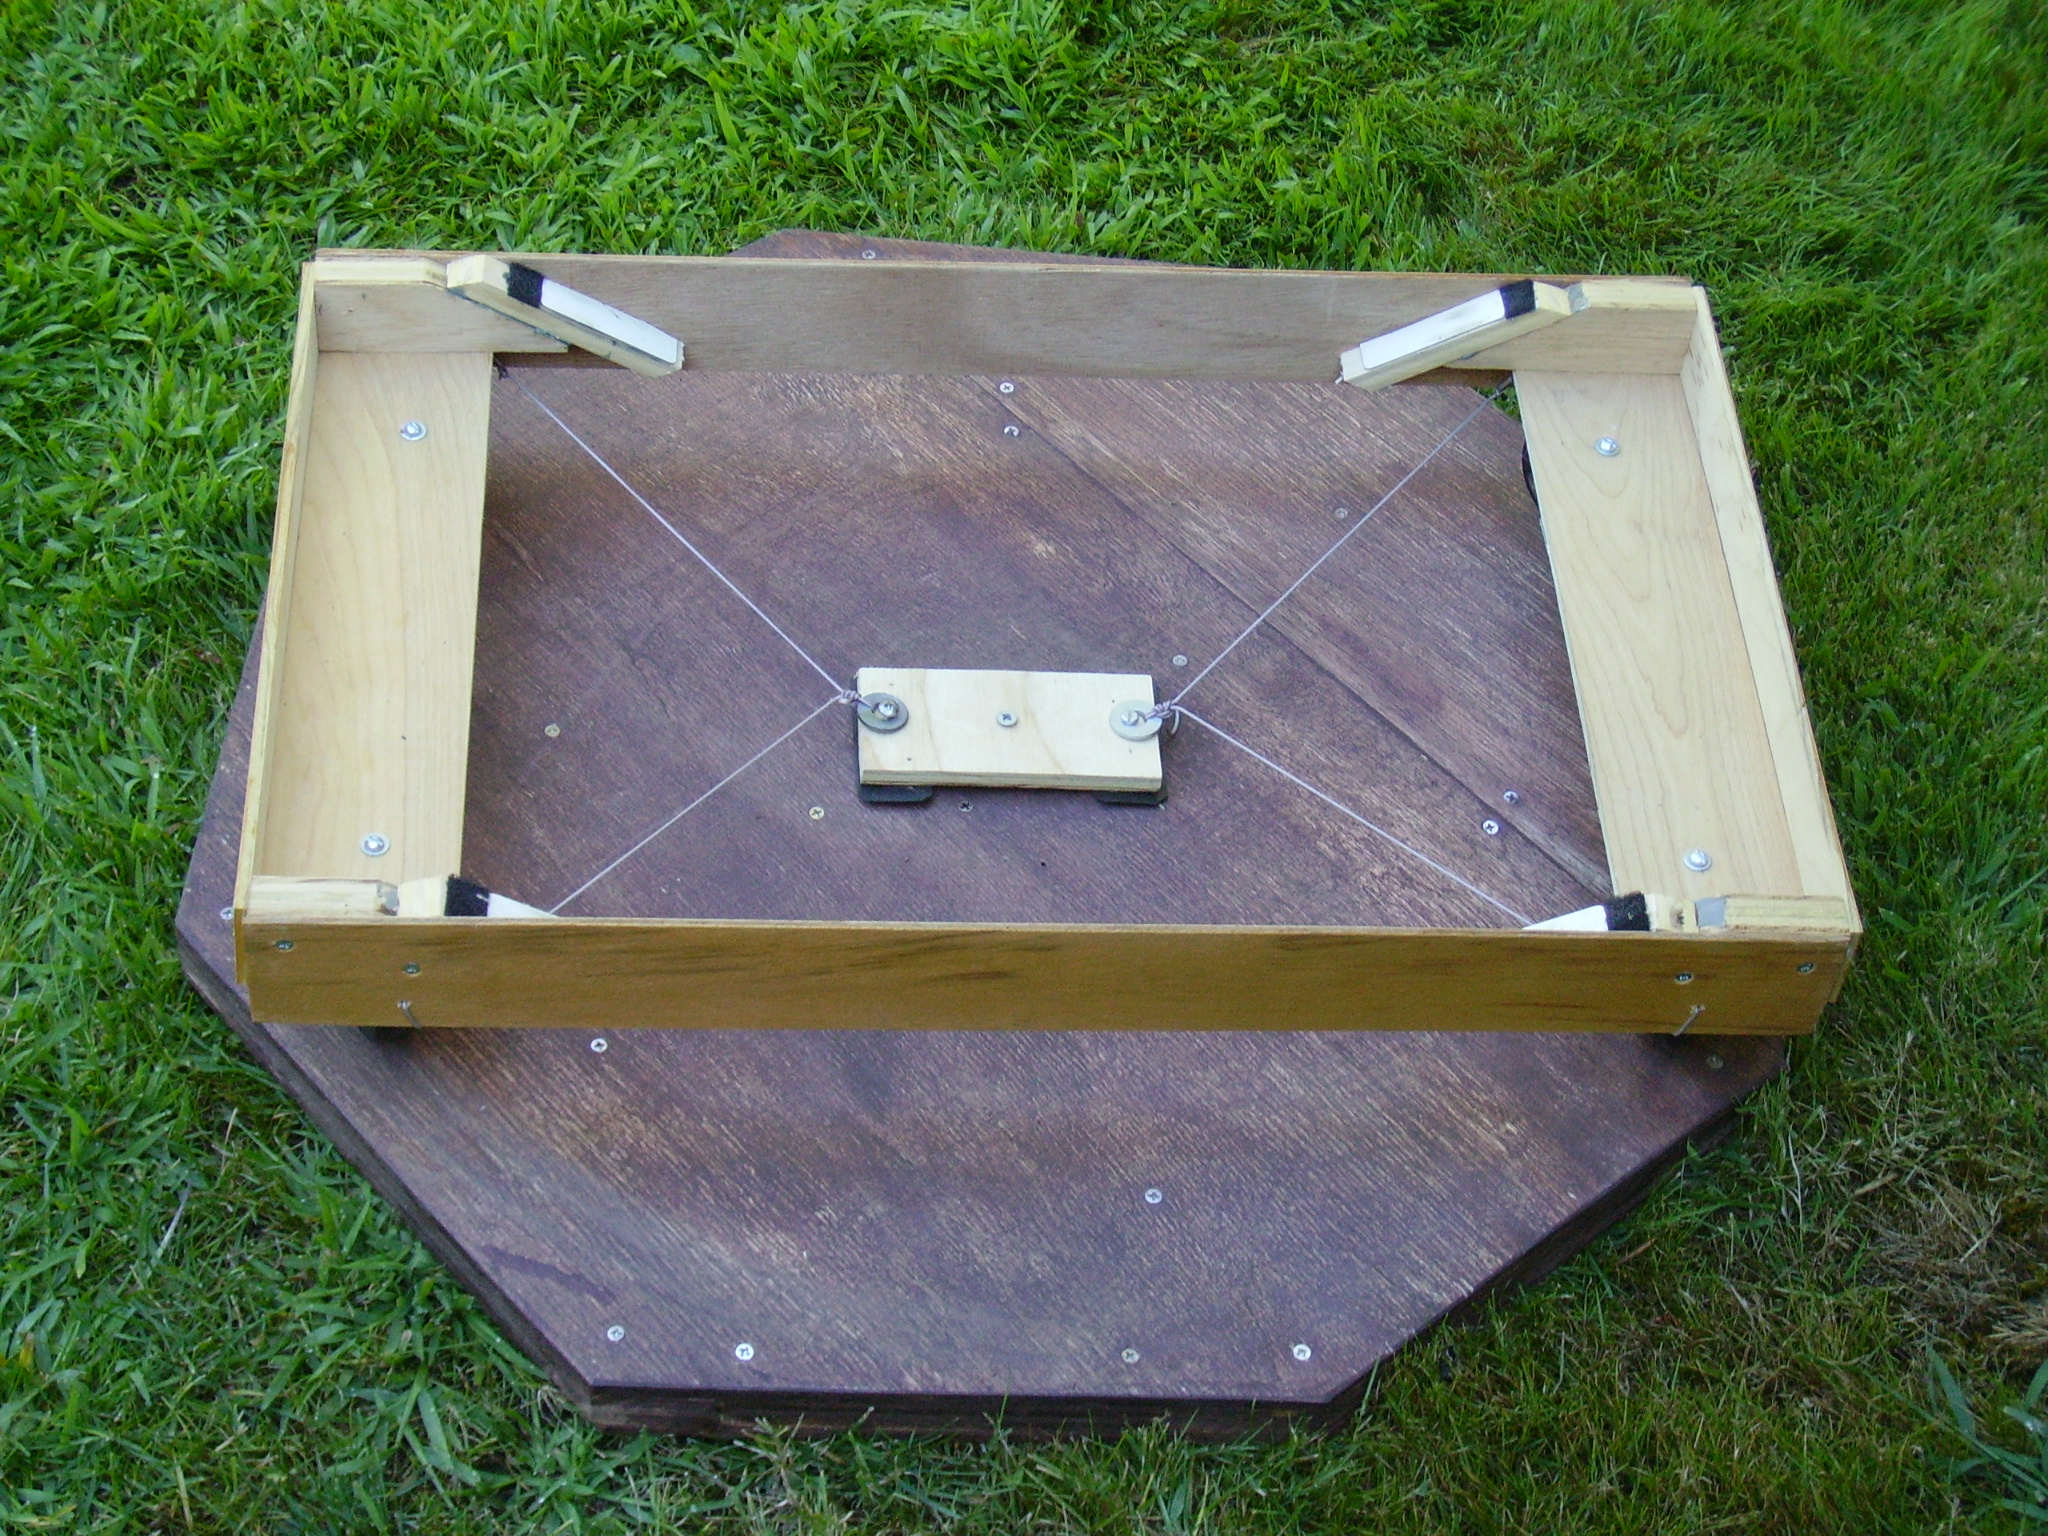
The rocker base is tethered to the baseboard - attached to the baseboard is a small block. Strings attached to the rocker base are attached to the small block (which is free to rotate). This works well.
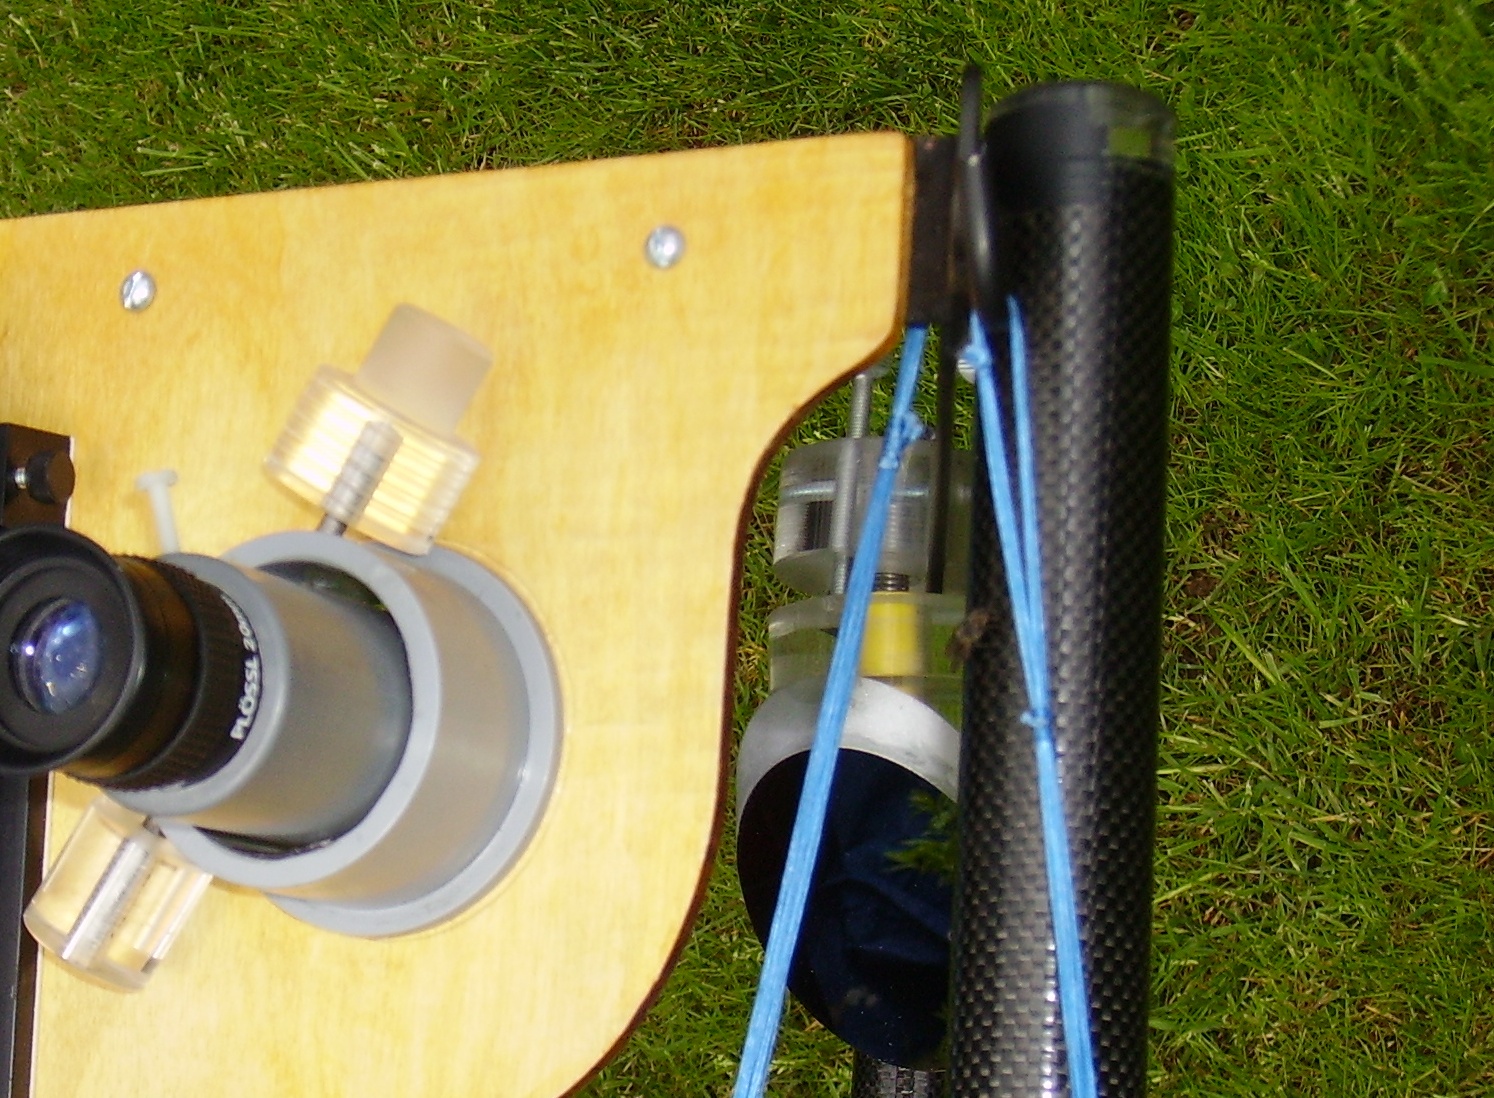
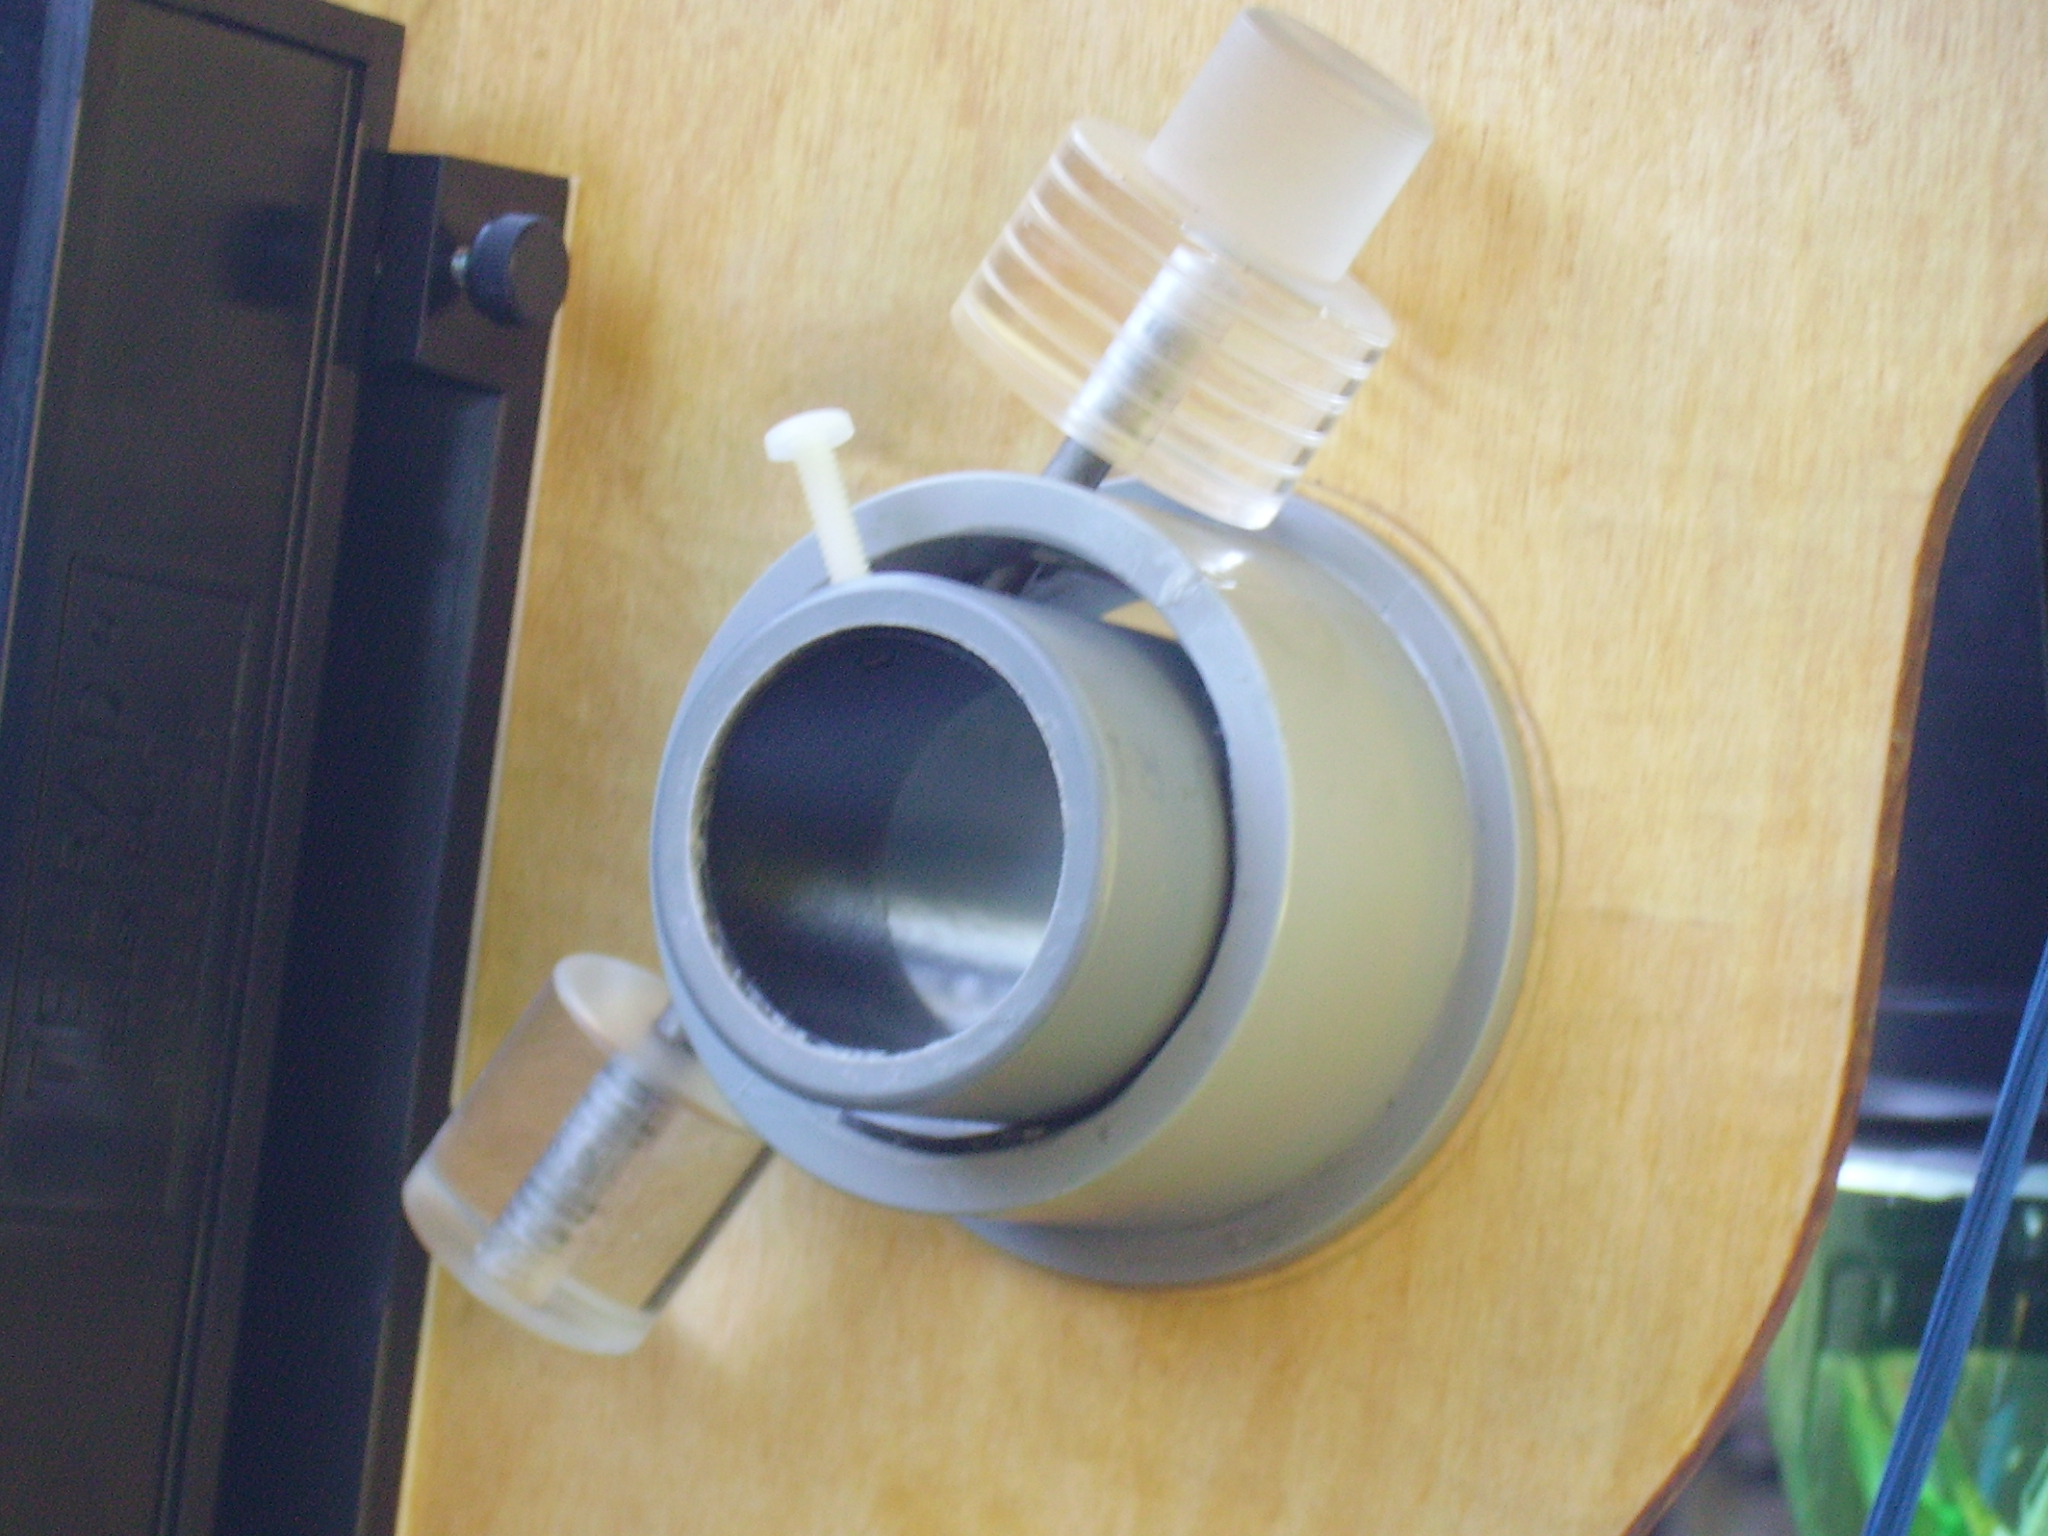
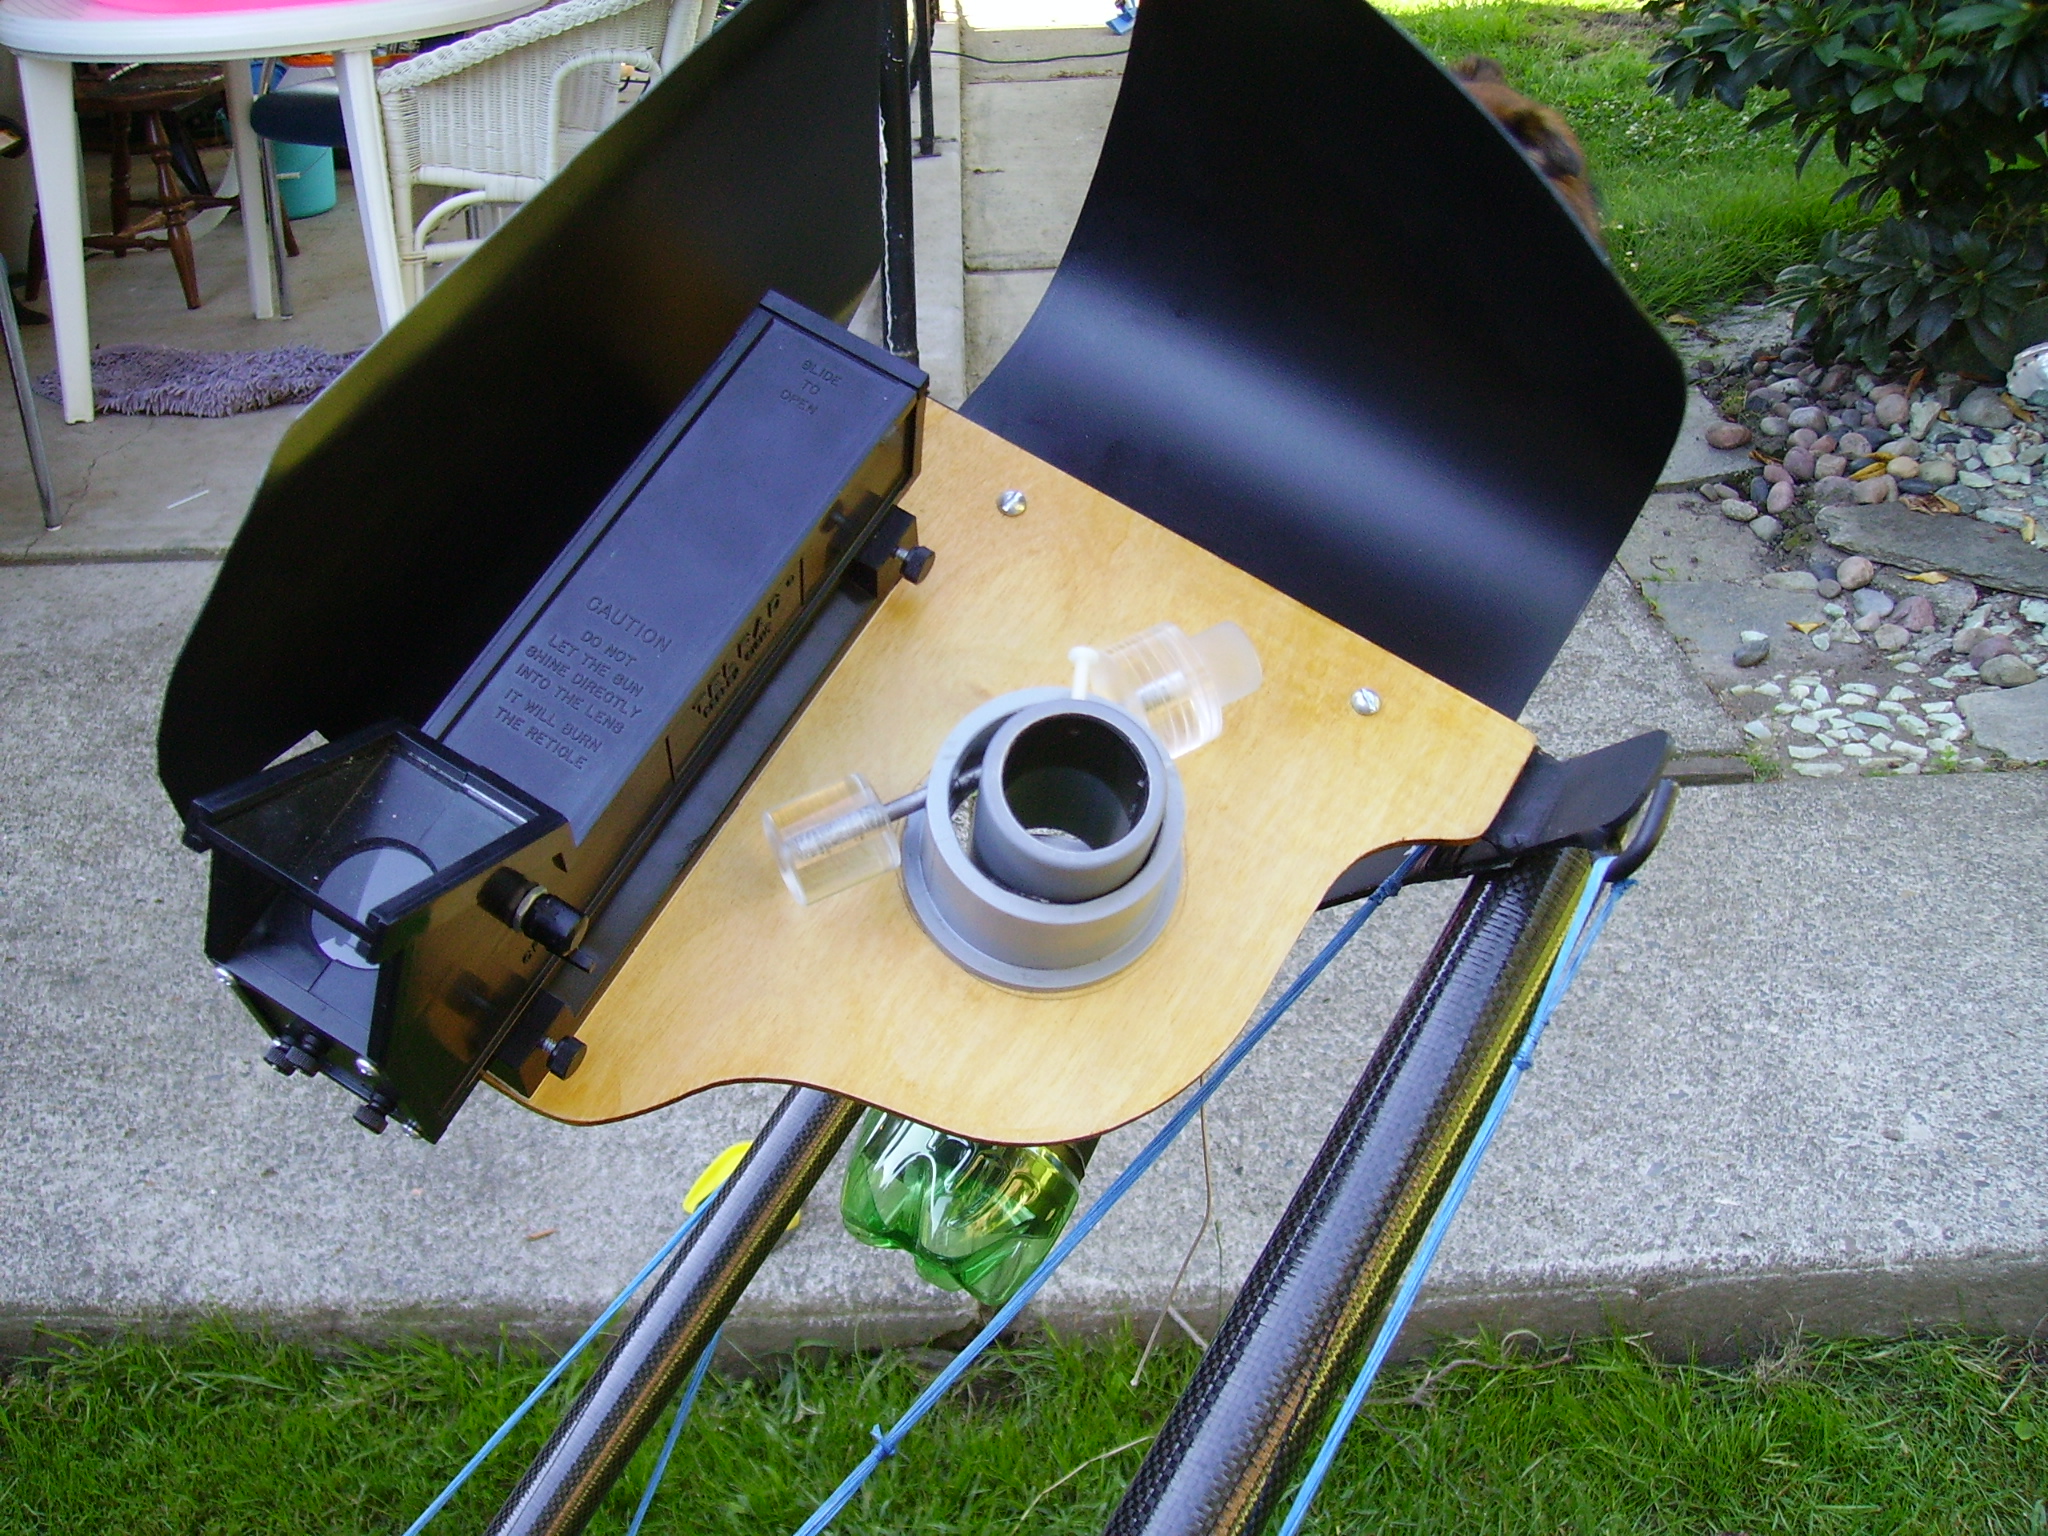
The focuser is also homemade. It consists of two pieces of plumbing fittings (1.25" and 2"). A hole was drilled through the 2" fitting and a small steel bar was inserted. A small piece of rubber hose was inserted over the bar and provides friction between the bar and the 1.25" fitting. Acrylic knobs were machined to fit over the bar for finger focusing.
Light shields have recently been added around the focuser and behind the secondary mirror (sorry, no picture of that). These are made from thin polyethylene sheets purchased from a plastics store. This material works well for a variety of things. It was also used on the rockers to reduce friction between the rockers and the formica pads.
Keen observers may have noticed some of the above pictures show brown string, others show blue. The brown string was purchased from a hardware store while I awaited arrival of the blue archery string (it took longer to arrive than I expected). I have kept the brown string as backup incase an archery string breaks. Archery string is typically used on string telescopes due to its high stiffness (doesn't stretch much).
Revisions in 2017
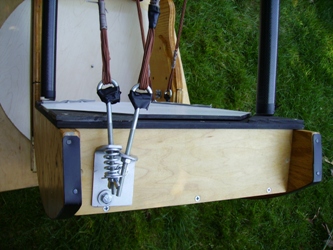
I revised a few things in 2017. The rocker arch connection joint in the old desing caused a "bump" to occur as the scope transitioned from horizon to zenith. This was eliminated by going to a tri-arch rocker. I also redid the groundboard arrangment:
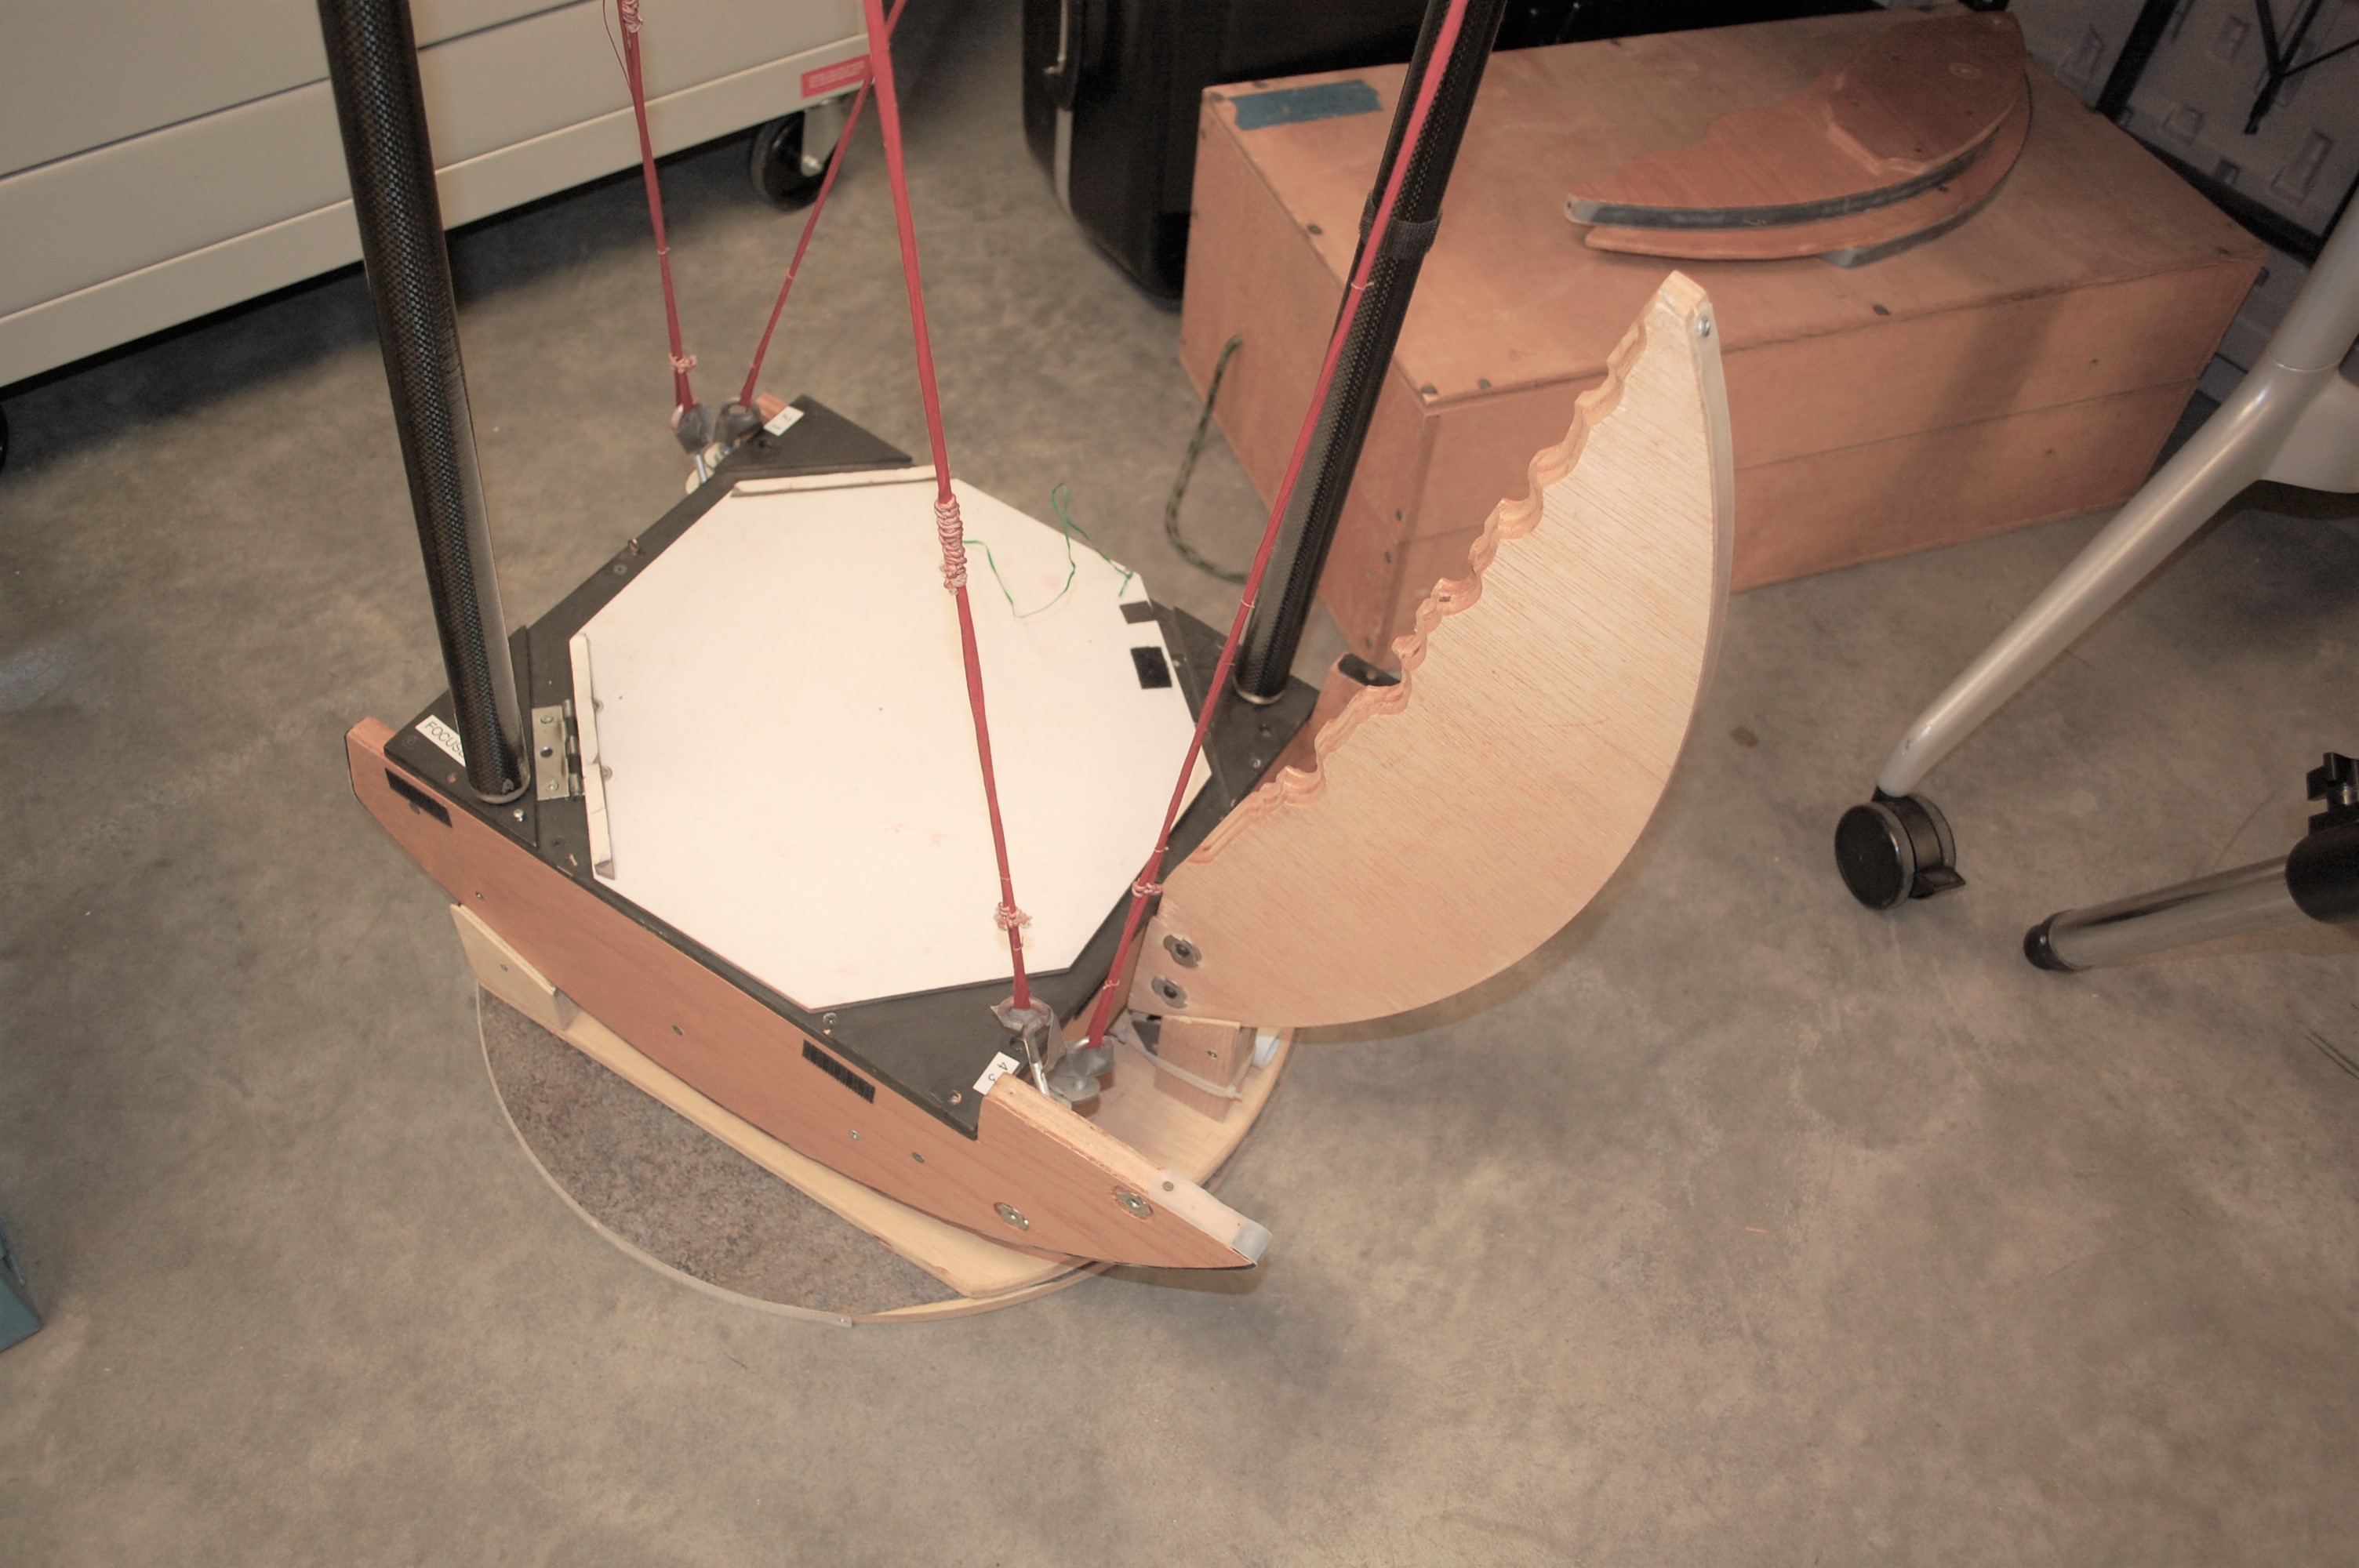
One drawback to this is that the scope is less stable and tips more easily. (Note the odd looking PVC pipe in the image at right - this was a field repair, that needs further repair)
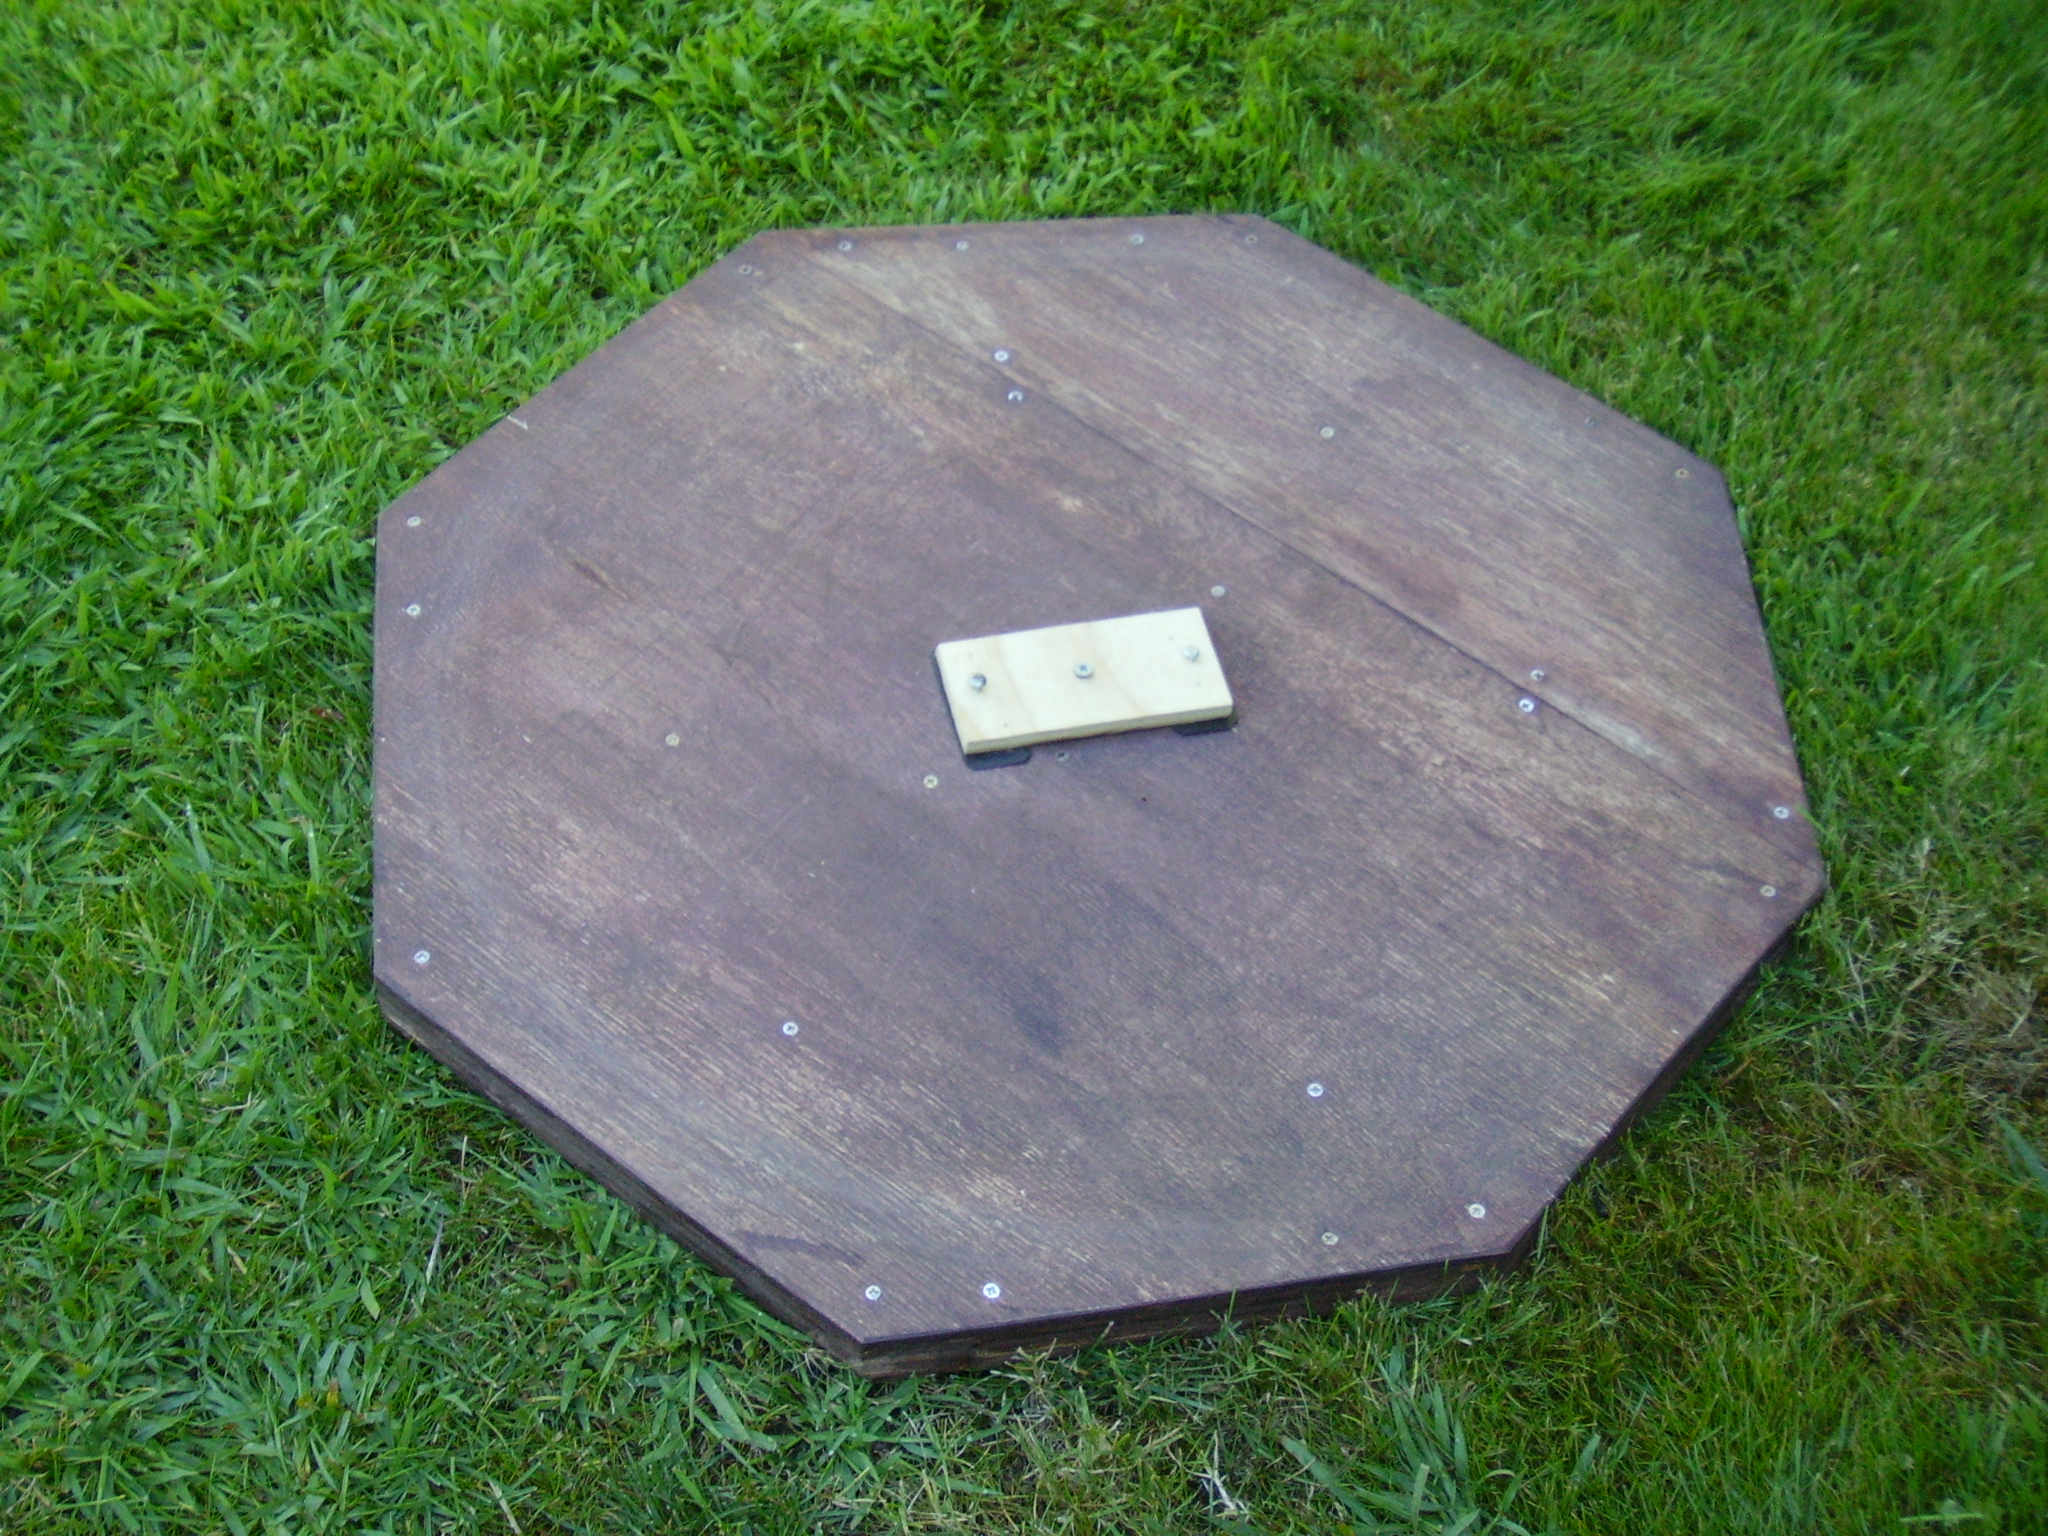
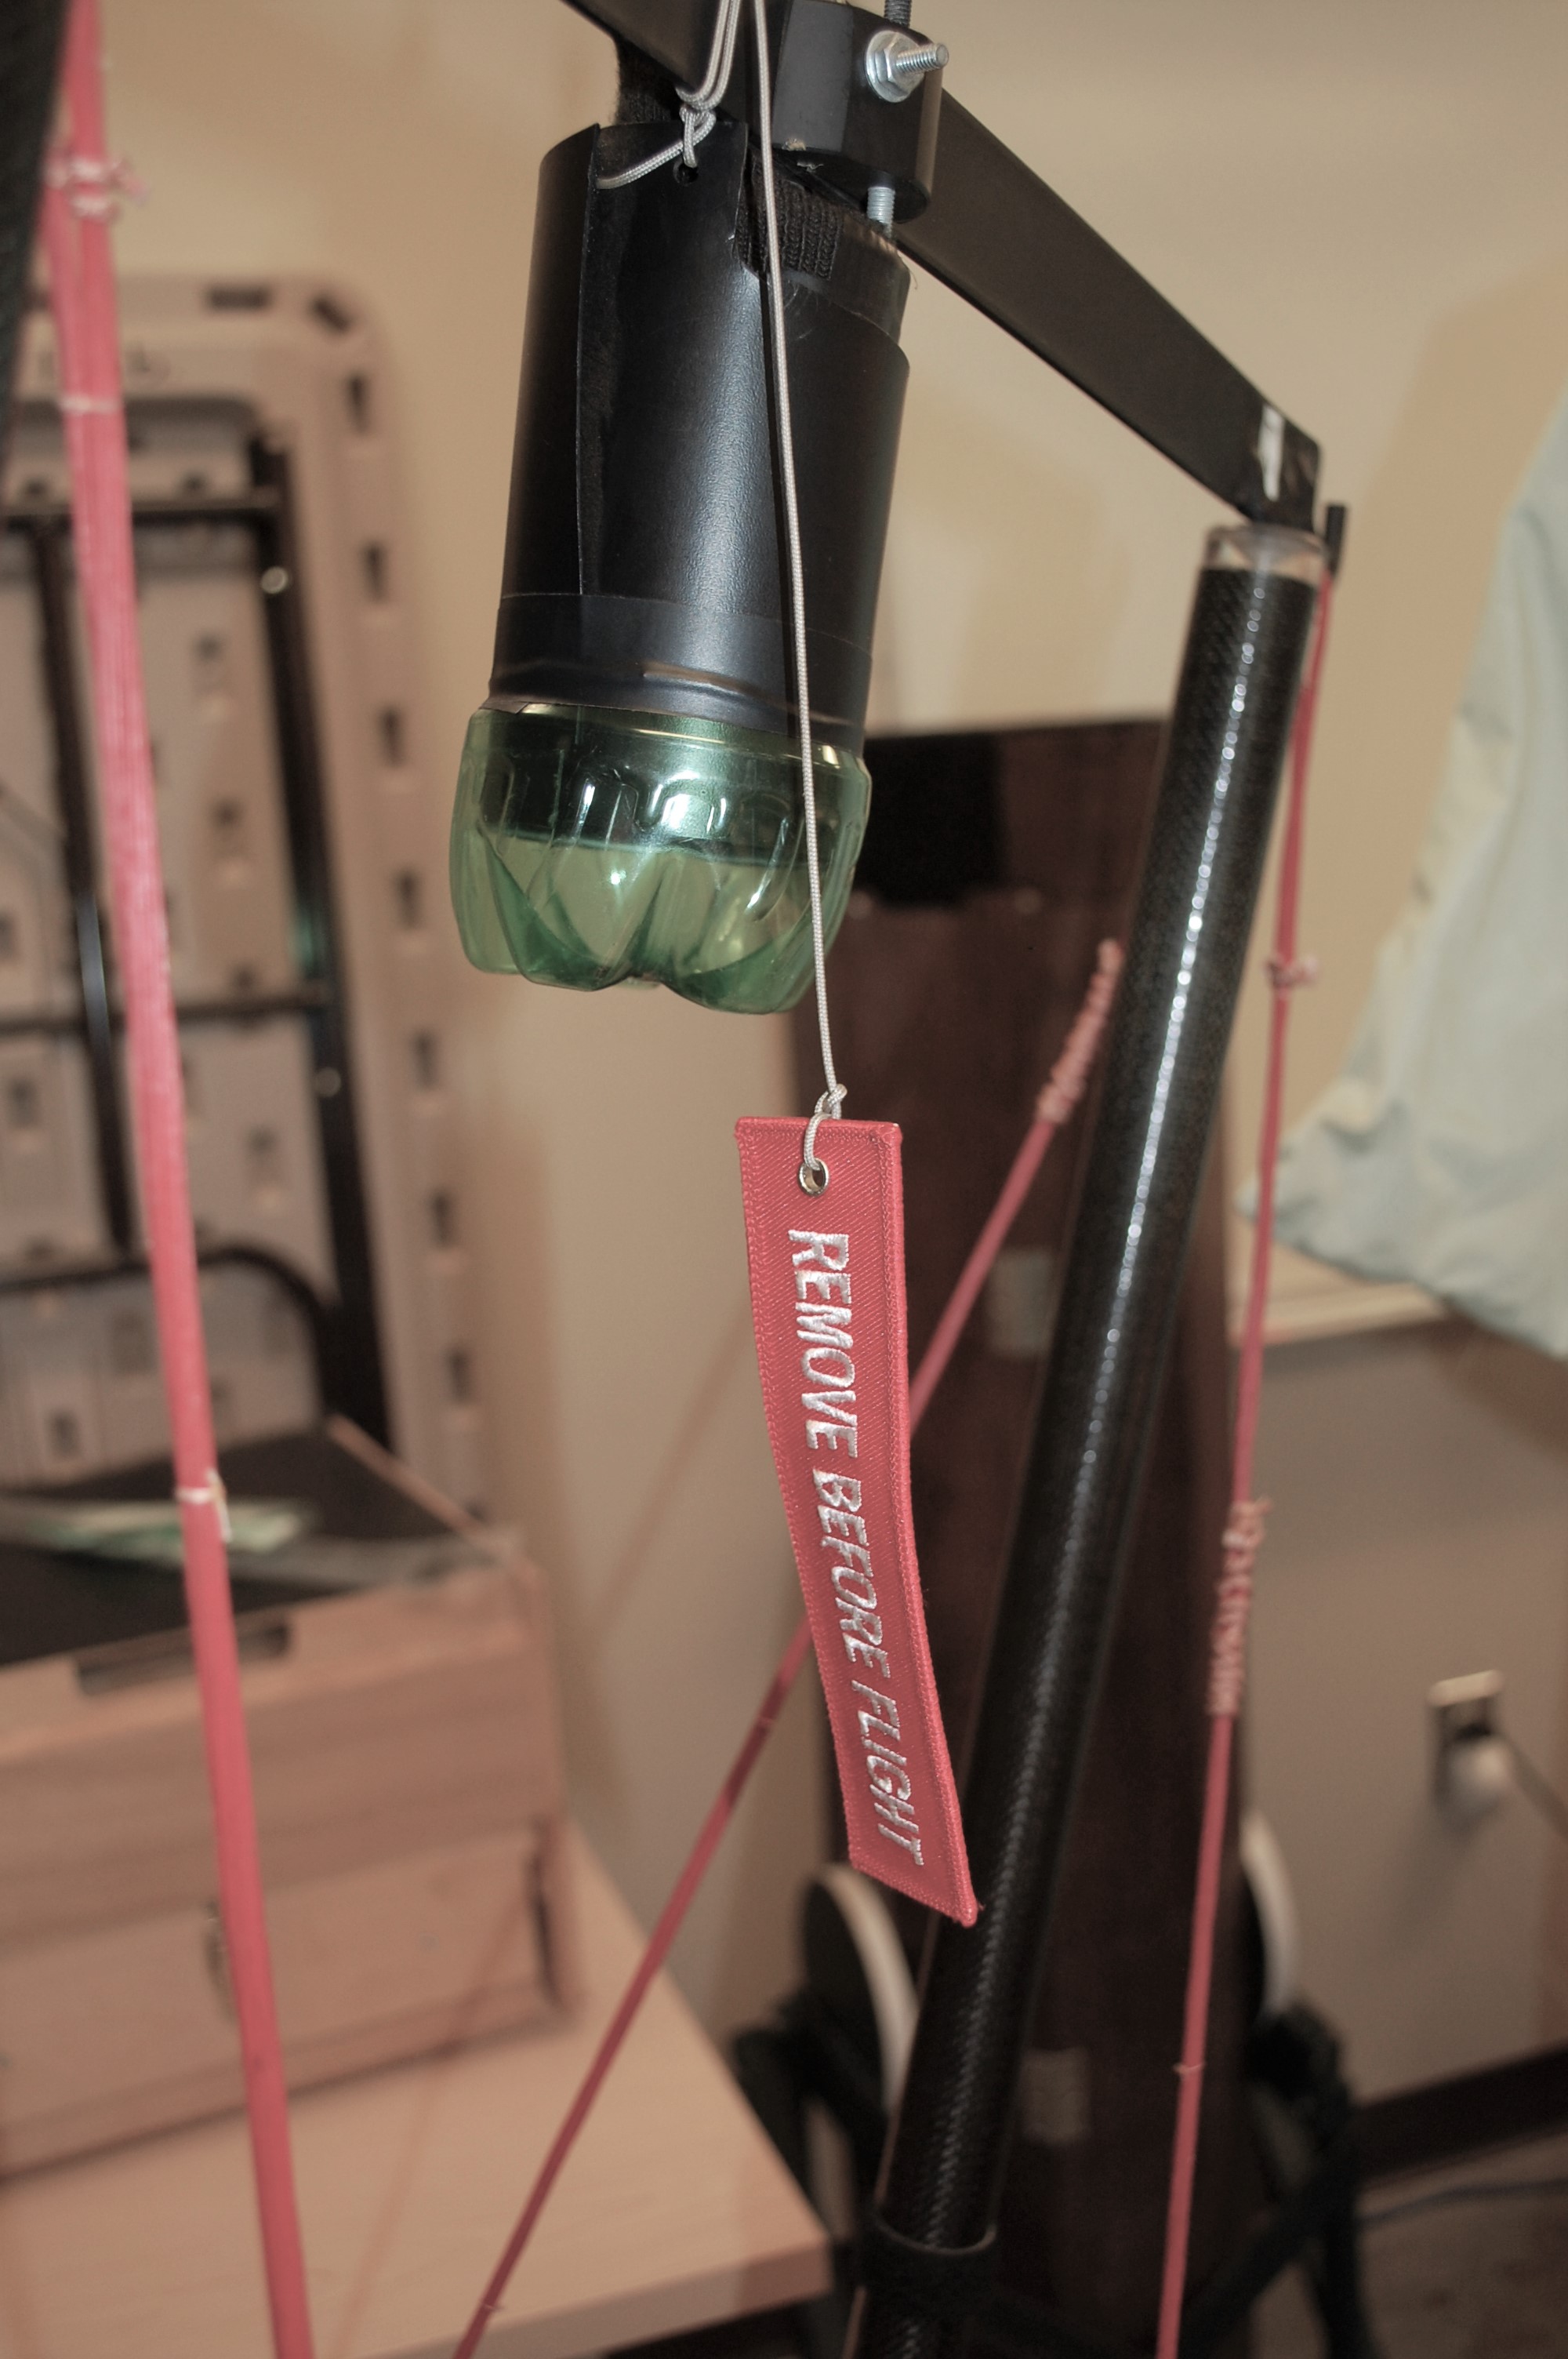
One other small improvement was made to the secondary mirror dust cover. I used to tie it into place, now I have a counterweigth to help hold it in place - REMOVE BEFORE FLIGHT tag. (On more than one occasion, I've forgotten to remove the cover and spent a few minutes in the dark wondering why I couldn't see any thing).
Recommendations:
One thing that I'd recommend doing differently is to place the poles and strings midway along the sides of the box rather than on the corners like I did. I was trying to minimize the width of the box, so I wasn't able to put them midway. If you put them midway, then the box does not need to be so stiff/strong. Imagine standing in a box with your feet at the corners and try lifting the other corners - the box will flex. Now put your feet on the edges midway between corners and lift the box along the other side's midway - the box won't flex much.
This scope made its first "public appearance" on Mel Bartel's Telescope Walkabout at the 2007 Oregon Star Party and has been feature Gary Seronik's Telescope Workshop (October 2007, Sky and Telescope).
If you have question, email me at lulay@up.edu
Return to home